My New CUSTOM Strat! – Going FULLY Custom with LT Guitars
My New CUSTOM Strat! – Going FULLY Custom with LT Guitars
Introduction
After what felt like an eternity my custom Strat guitar build is completed! We have kept this fairly quiet and didn’t want to say too much. We have spoken to a few people about it and even showed fewer people some photos. I have had the guitar for a few days now and I have just been playing it constantly. Also prepped everything I needed for this article. However, it is all now ready and time for everyone to see.
In this article, I will start by talking you through why I decided to go fully custom, why I chose who I did to build it, specs and sound samples. I will also cover the build process and photos of the custom Strat from start to finish! At the end, I will have some lovely video shots of the guitar as well as some sound clips.
Why did I go fully Custom Strat
So why did I go for a “fully” custom Strat. What I mean by this is why didn’t I go for a Gibson Custom or Fender Custom shop? I will there is a few reasons! The biggest one is Although they are custom shops they still have a limit on what you can change and configure! I wanted some pretty dramatic changes which I knew both companies (or most popular companies wouldn’t do).
I love the Gibson scale length, I feel very at home on it and it is what I have been use to all my life. However I love the sounds you get out of a Strat or Telecaster. So I wanted a Custom Strat or Tele but with a Gibson scale length. You may now see why Gibson or Fender wouldn’t do this!
I also was thinking about weight. As this was going to be a work horse guitar and highly used, I didn’t want something heavy. Didn’t want it to be a chore to hold and move around. So told Lewis to try to make it as light as possible (or within reason). I think we have successfully accomplished that!
Why LT Custom Guitars
Why did I go with LT Custom Guitars for my Custom Guitar build? Lewis was also so enthusiastic about the build, being a bit different and having some very specific requirements, we both got excited while chatting about it, he gave his input and recommended some ideas, and we bounced off each other very well. Plus the fact that he is left-handed helped loads because it meant he would be able to play it when it was completed which meant two things. He would be super excited and also the set-up would be perfect (After playing It, it is the best set-up I have ever had).
So what about the other brands that do custom guitar builds like Kiesel or Balaguer guitars? Well, there are a few reasons, to be honest. I wanted to support a friend, a friend that I know does amazing work and I have played his guitars before. Plus, throughout the build process, Lewis would send me pictures of the work being completed. Would you get that from a bigger brand? When he picked up the wood I got a picture, Carved the neck he sent me a picture. When he first put strings on it he sent me a video. You wouldn’t get that with a mainstream custom Shop. A major bonus of going with a local custom builder!
Custom Strat Guitar Build: Woods and Specs
So before we go through the whole build process and talk about how the guitar came to life. I thought it would be best that we run through the specs first. So below is a quick list of all the specs on this guitar.
Body: Paulownia
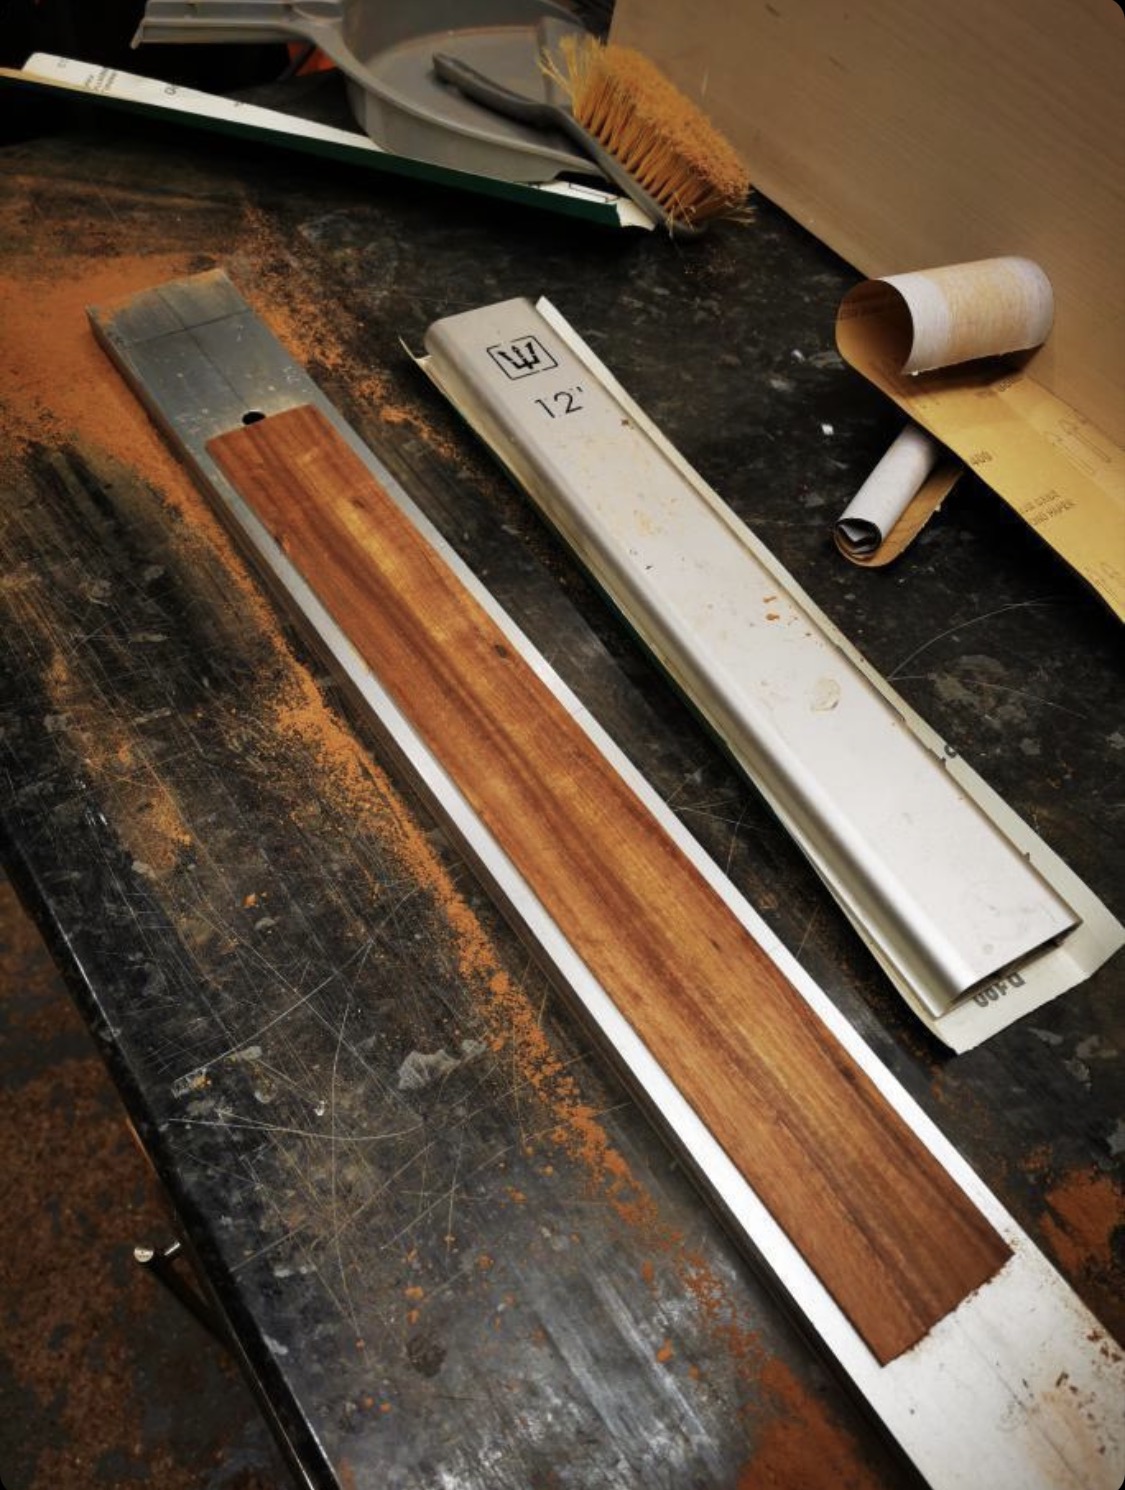
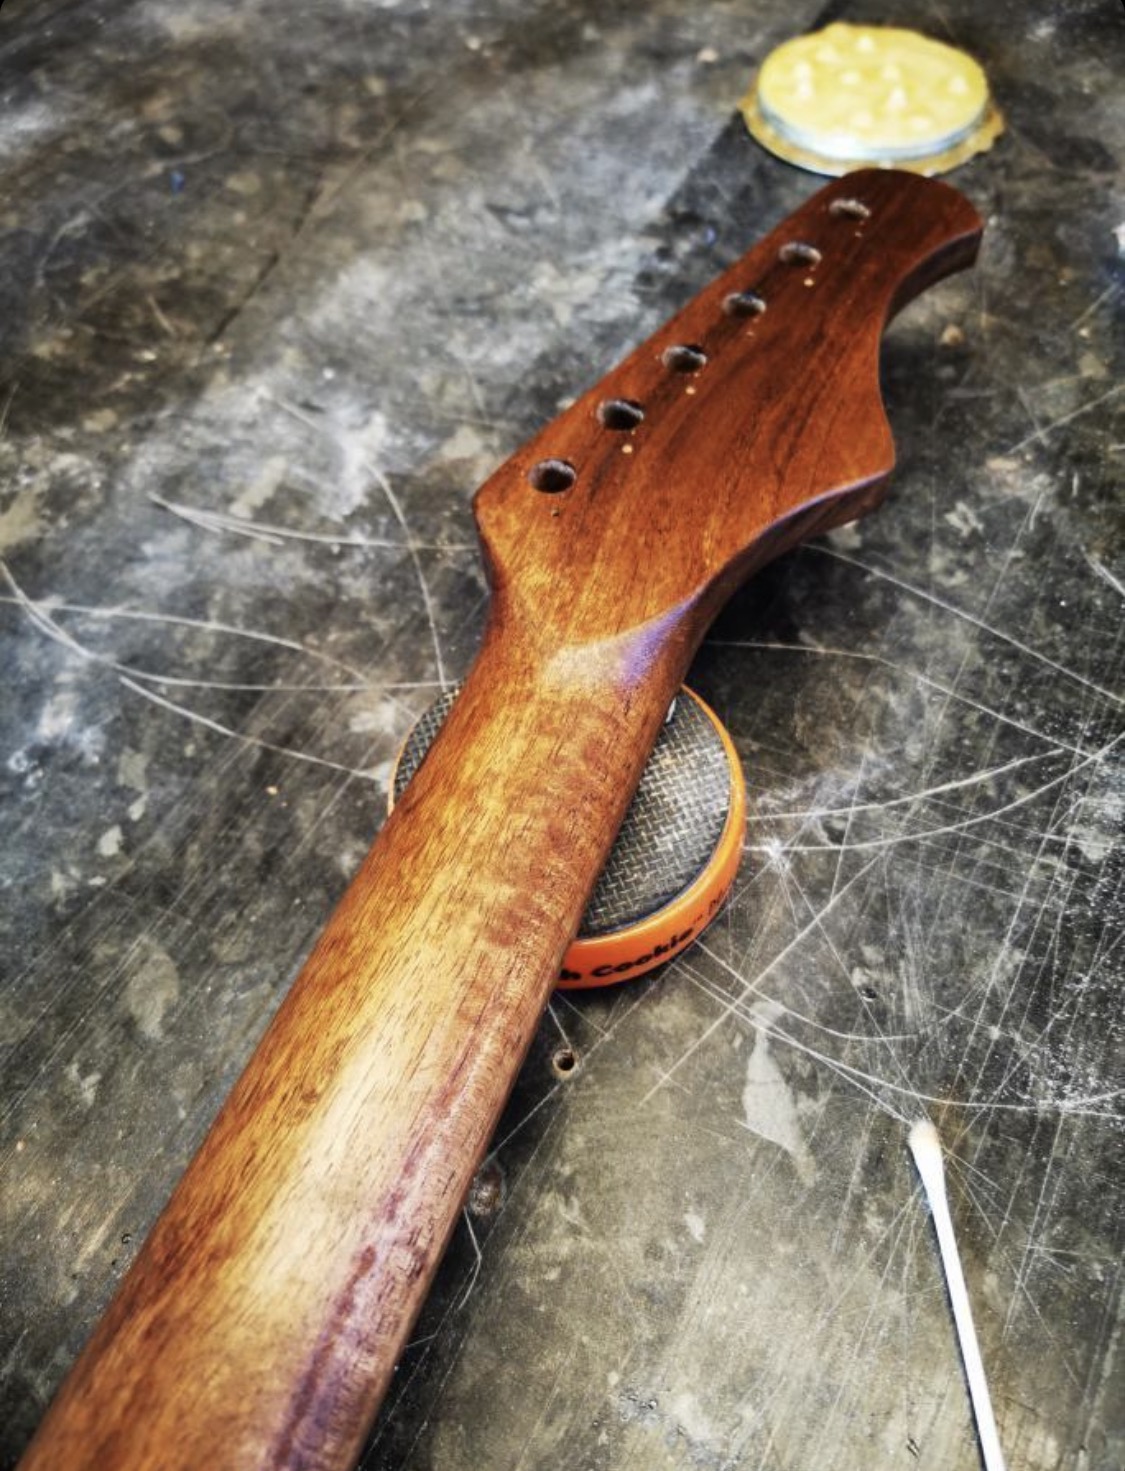
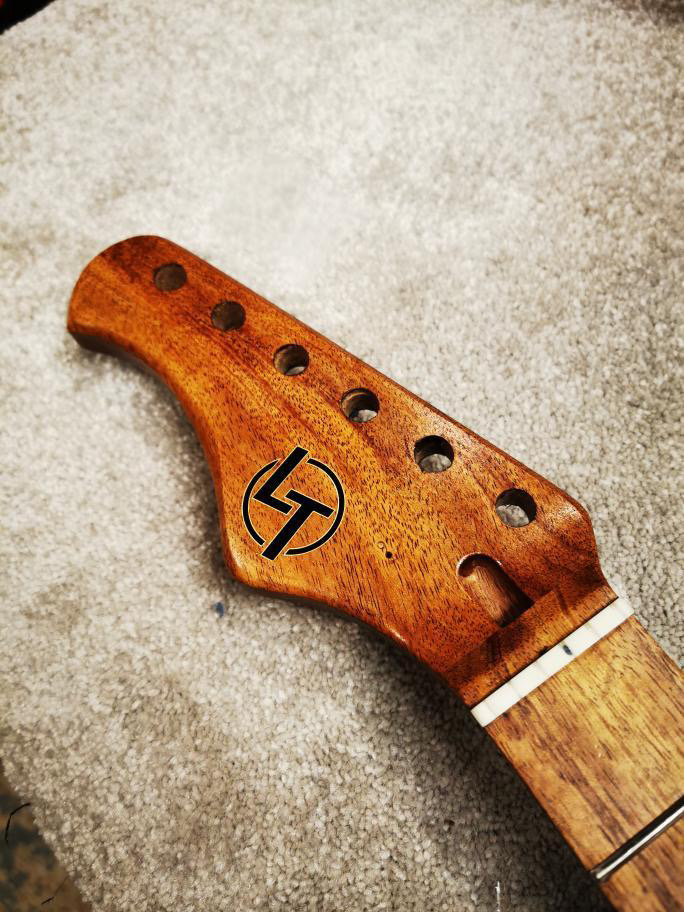
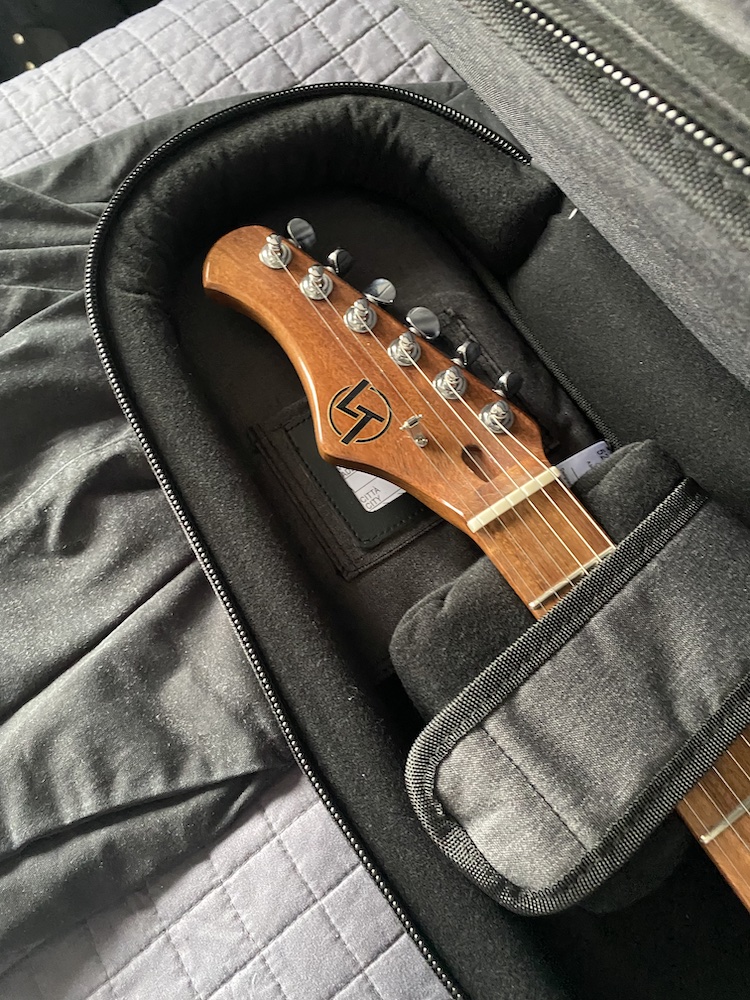
Fretboard: Tasmania Blackwood
Neck: Tasmania Blackwood
Bridge: Babicz 2 Point Trem System
Tuners: Gotoh SG381
Nut: Corian
Pots: Omega
Frets: Nickel Steel Medium Jumbo
I have missed out the pickups on purpose as I feel they desire their own section, so why don’t we cover the pickups quickly.
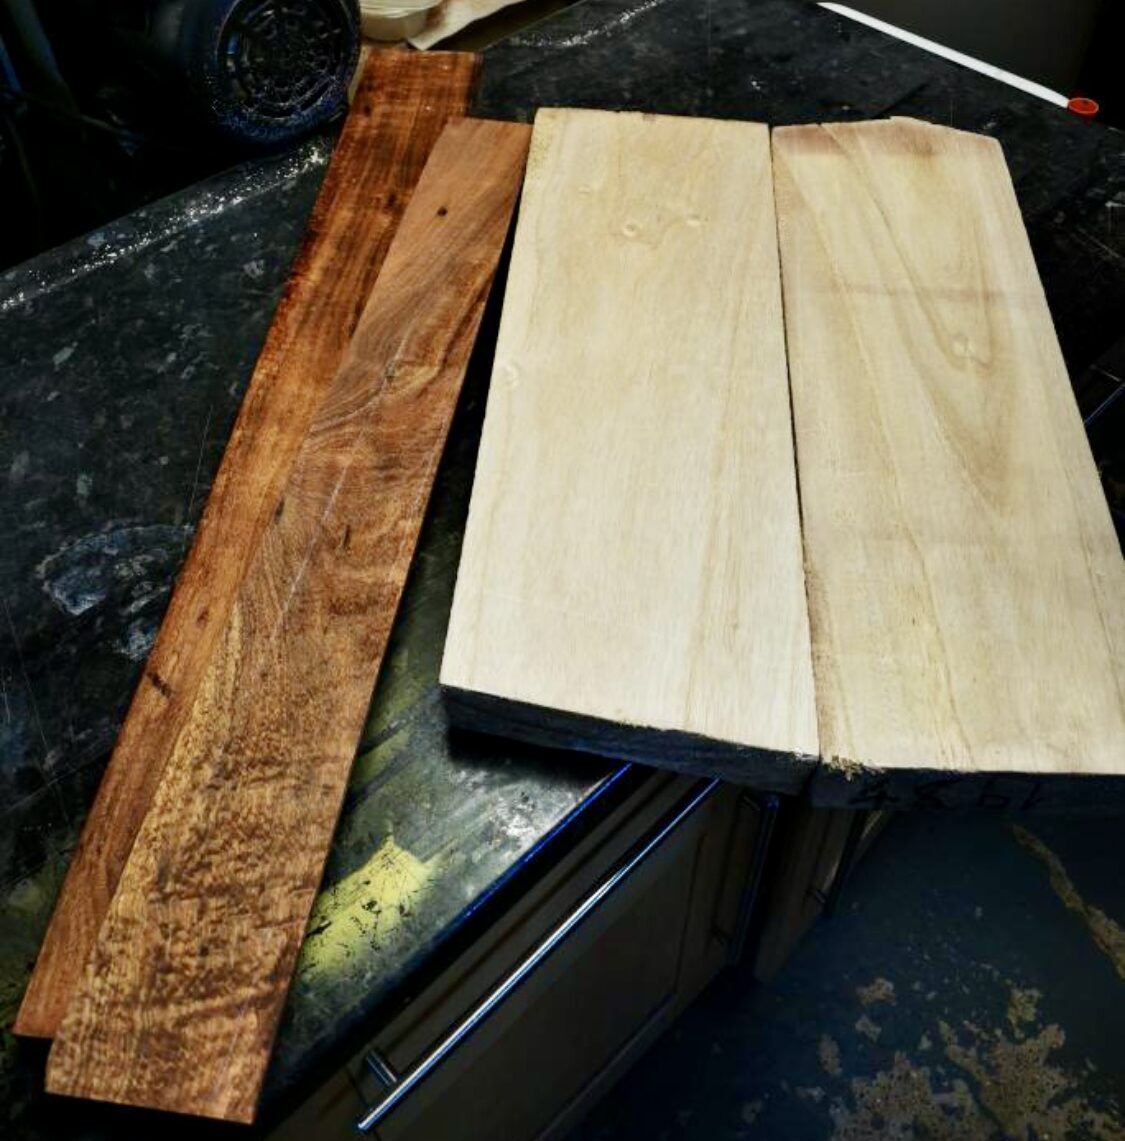
This was the first step, Getting the Body and neck blanks!
What is my pickup Choice?
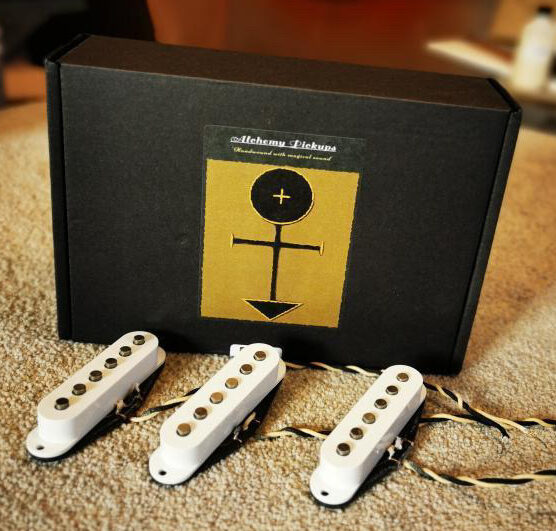
After building my Telecaster, I only wanted to put one brand of Pickup in and that was Alchemy! I was so happy with the pickups Jack built for the telecaster I wanted to see what he would do for this build. Speaking to him he recommended the “Mercurials”. Which he said are similar to a vintage pickup but with a slightly higher output. They are ALNiCo III Construction and came out around 7.6k at the bridge, 6.7k on the middle pickup and 6.5k at the neck.
As you will be able to tell from the sound clips below, they sound amazing and are crisp and punchy! If you are after a set of pickups I highly recommend checking out Alchemy! They are outstanding value for a custom set of pickups!
These are the Hand wired pickups going into this custom guitar
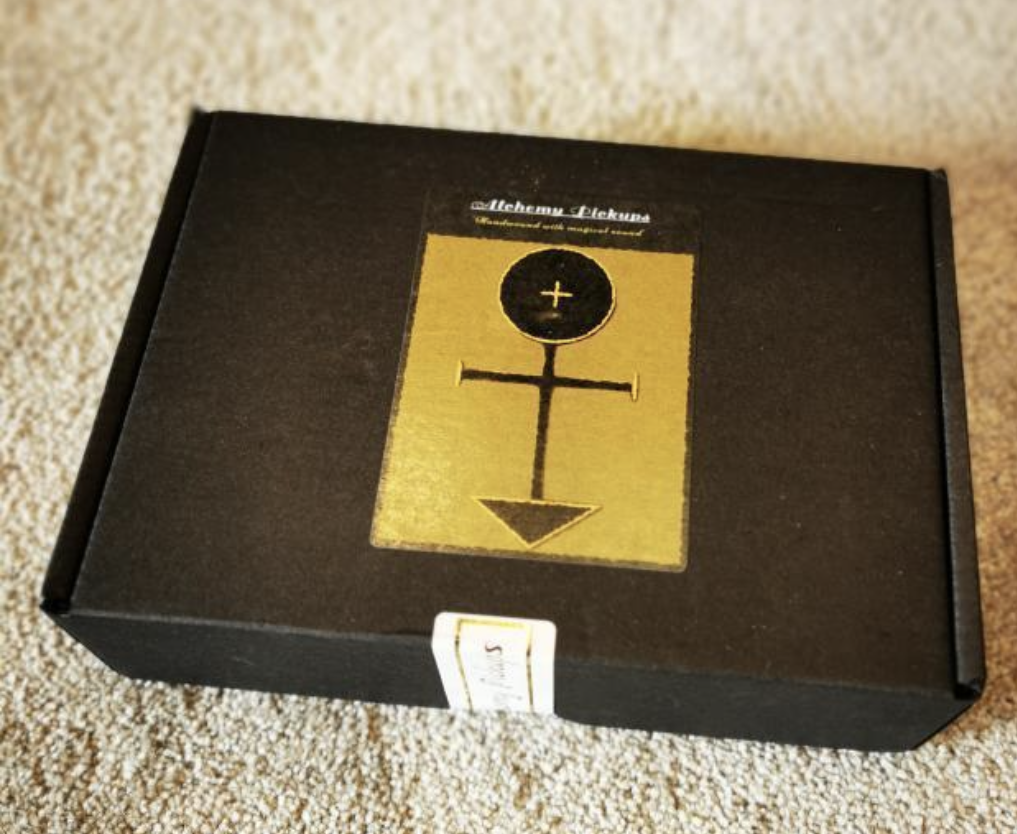
Alchemy's packaging is always so nice!
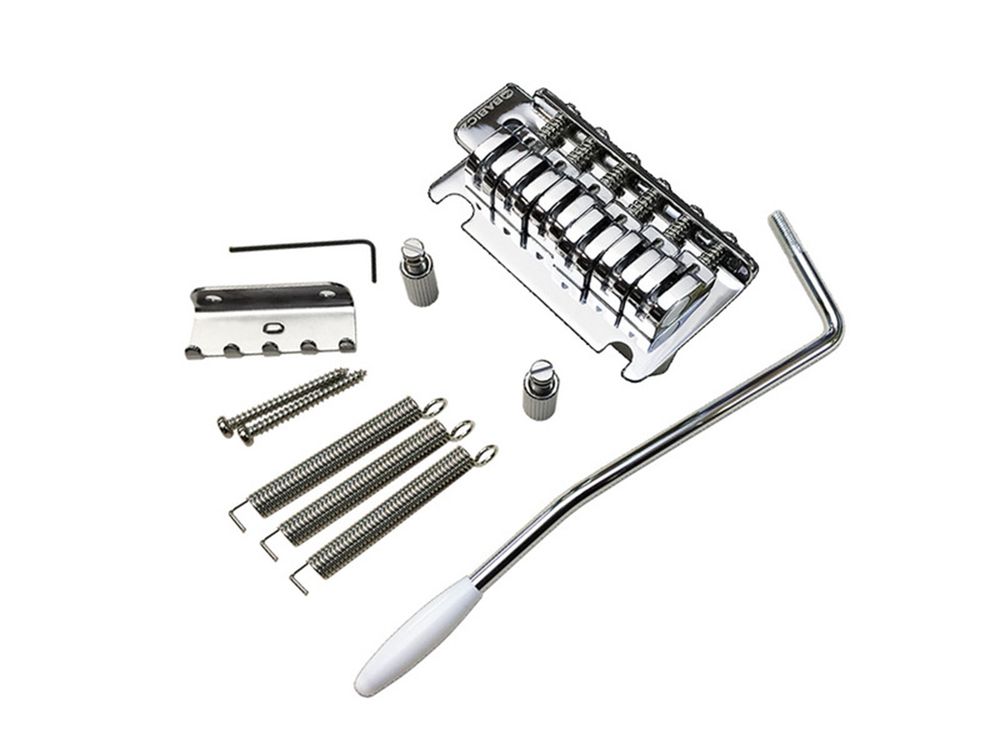
Why this Bridge?
So let us talk about the bridge for a bit. This was a surprise this bridge! I know it is hard to believe but finding good quality left handed bridges at a sensible price can be tricky. However, I was scrolling through Instagram and came across Babicz Guitar parts. They are an American based company who make various guitar parts. I had a look through their website and found a 2 point left handed Trem system at a fair price. Decided to order one not knowing what it was going to be like and when it got delivered I had a look and it felt and looked high quality and well made.
I then sent it on to Lewis to install and he installed it and had a little play on it. After about a week of use he messaged me and said that he was considering using their Trem systems and bridges for all of his builds. If that isn’t a high enough praise for this Trem system i don’t know what is. A bridge so good it has made a builder consider swapping entirely to the brand.
The Babicz 2 Point Trem is available both Left and Right Handed!
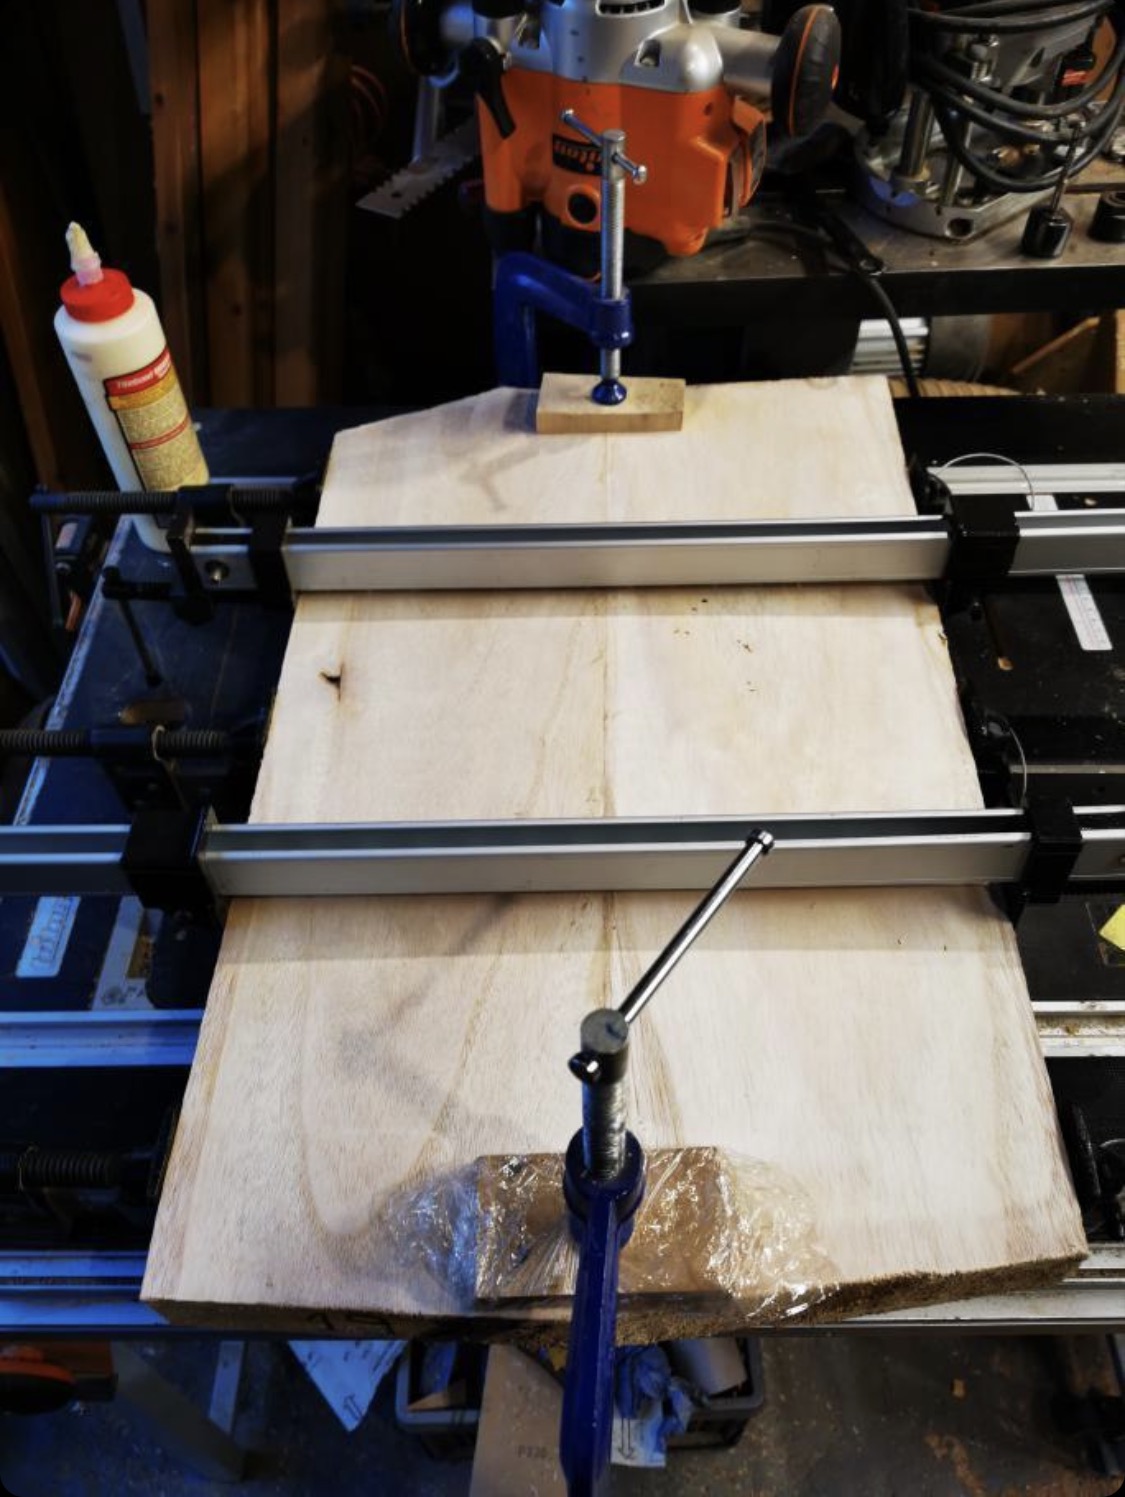
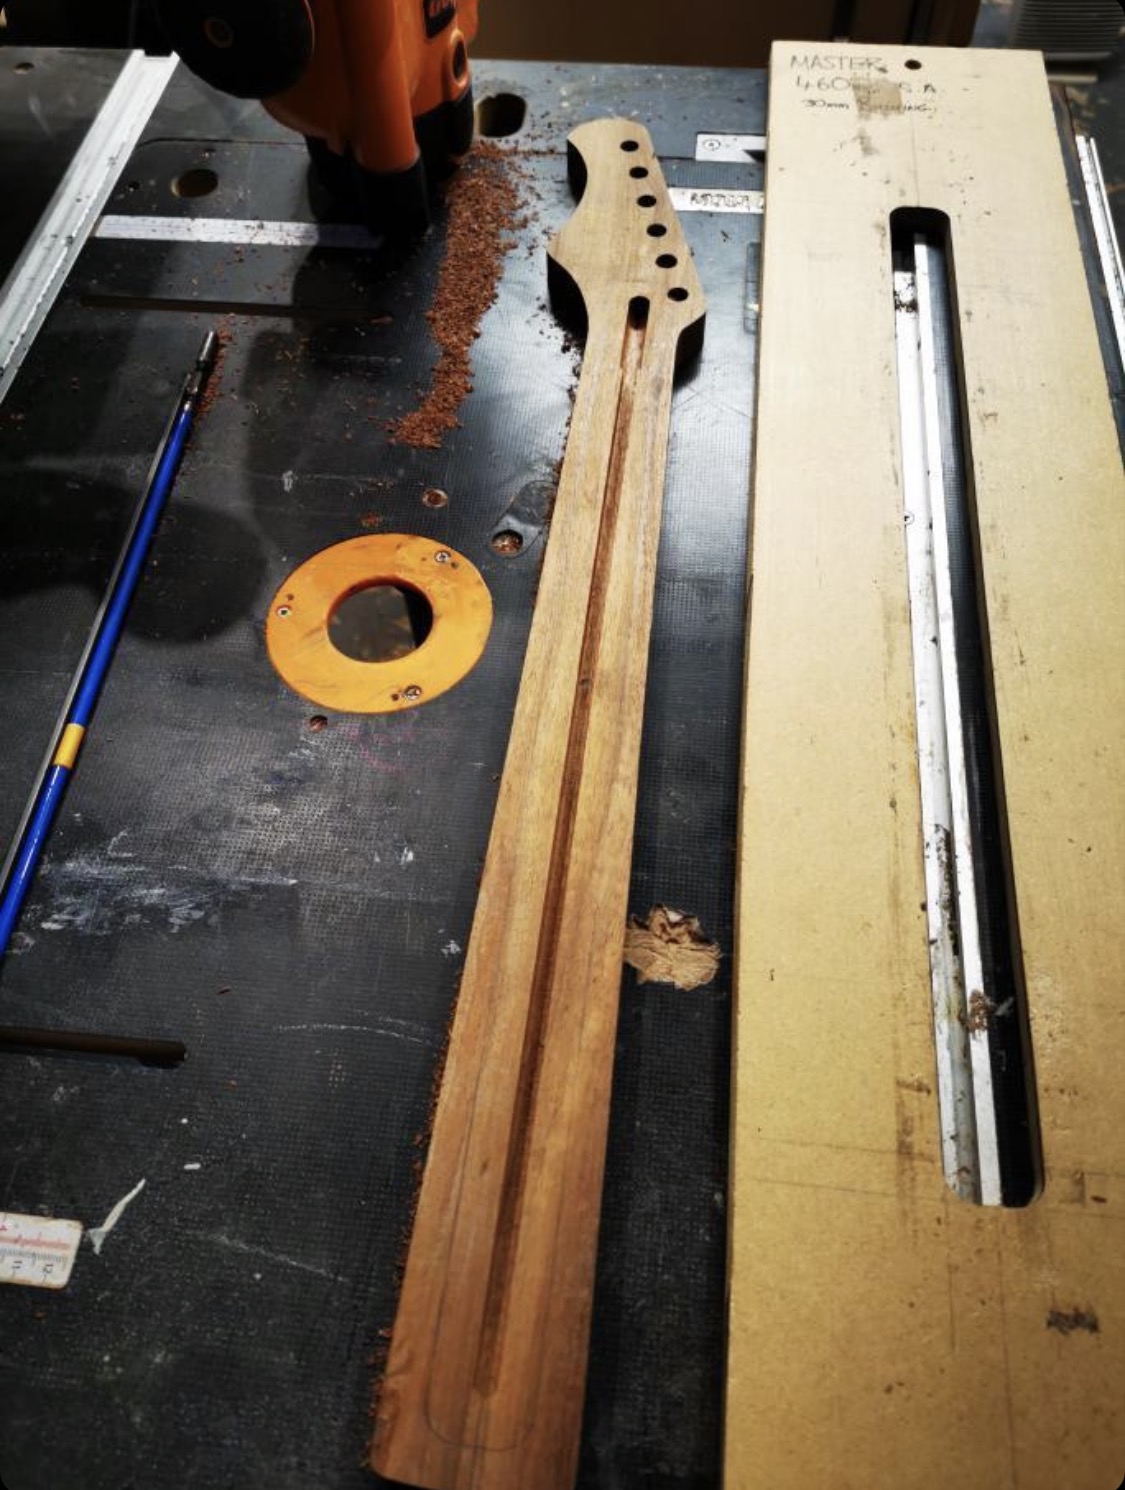
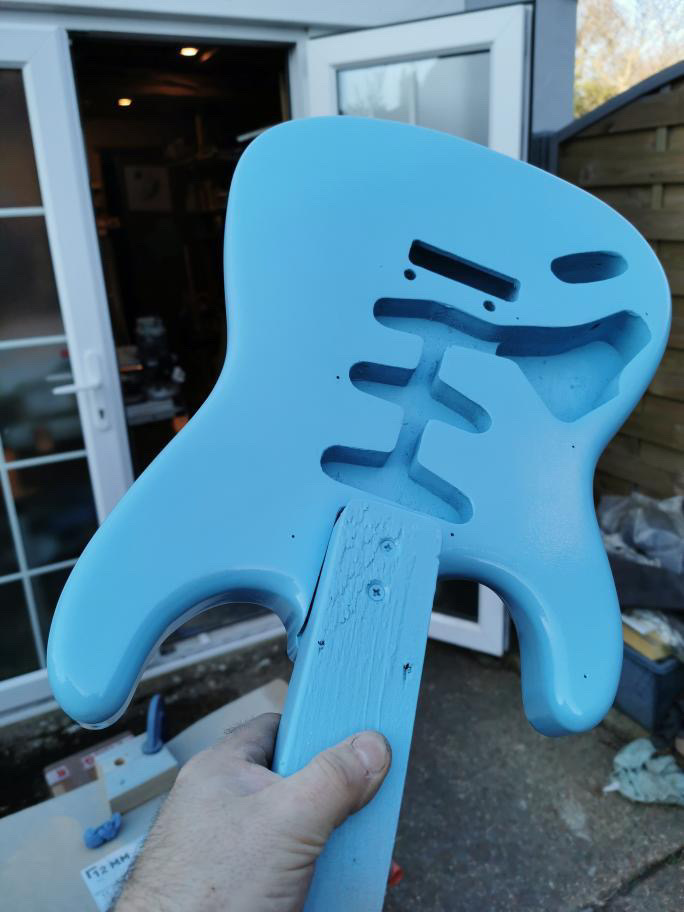
The build started off glueing the body blank, from there Lewis then had to design the templates. Being a shorter scale length he thought it would be best to scale the body back slightly to make it look “right”. So he drew up the plans and began to cut out the neck and body blanks.
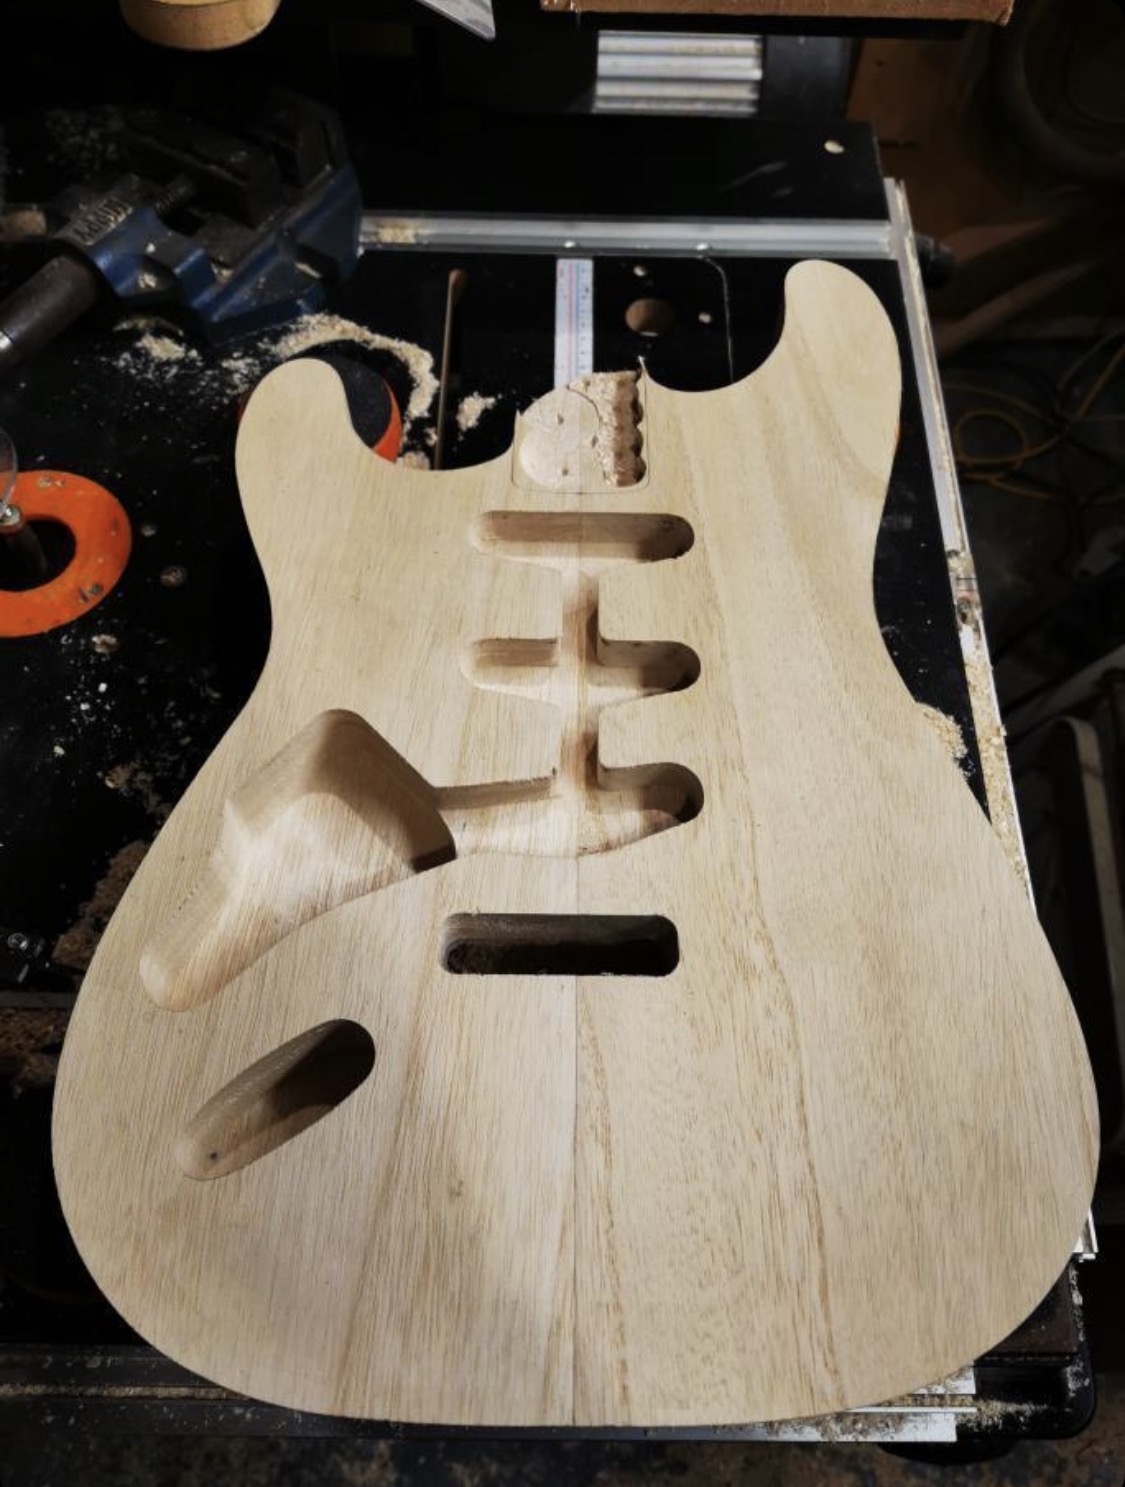
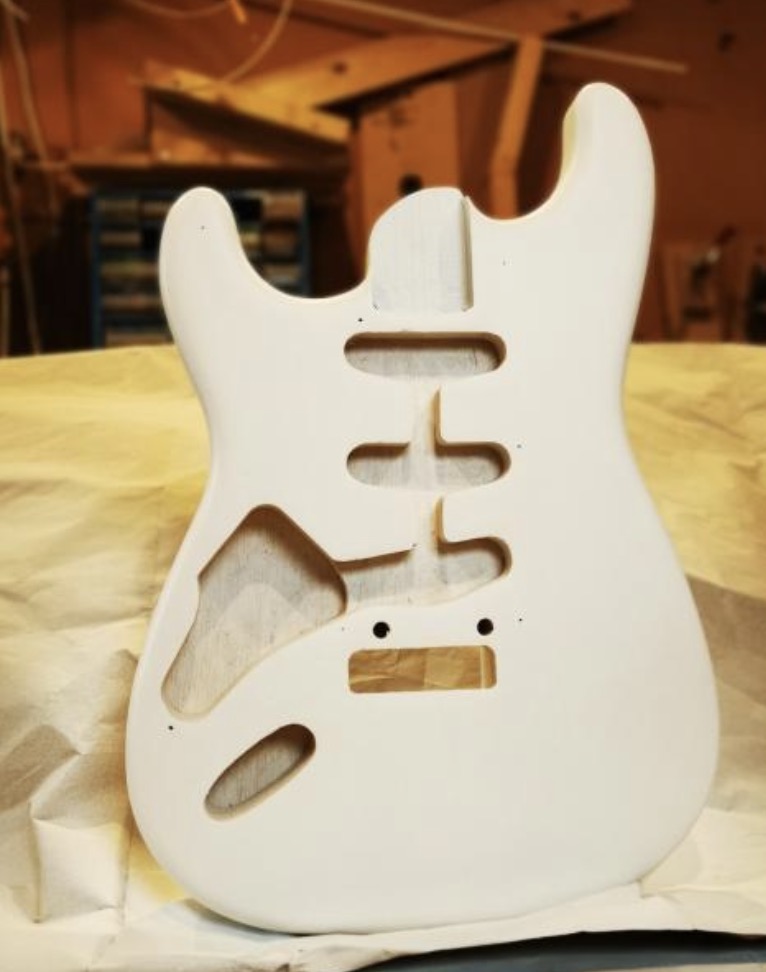
Once Lewis had the blank he then began to refine the shapes and begin to carve the neck. The next step was then to route all the cavities for the pickups, Controls and Bridge. Once the cavities were carved he could then finalise the shape and add the contours and the cutaways.
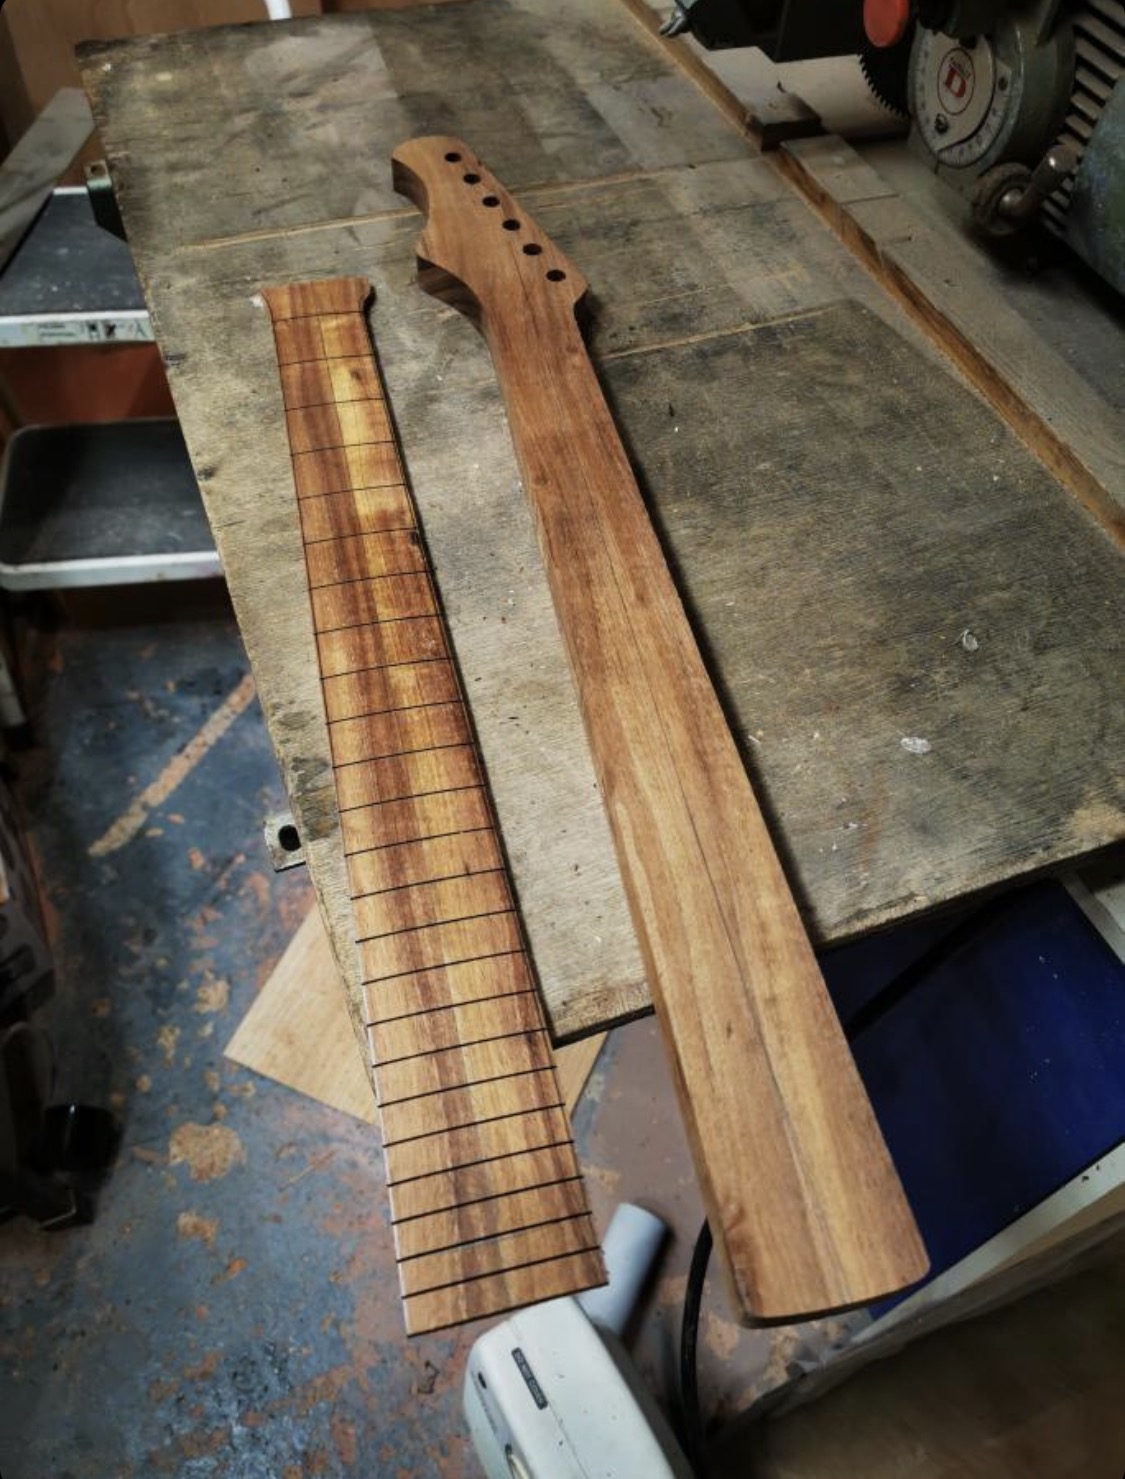
Fitting Frets and Nut
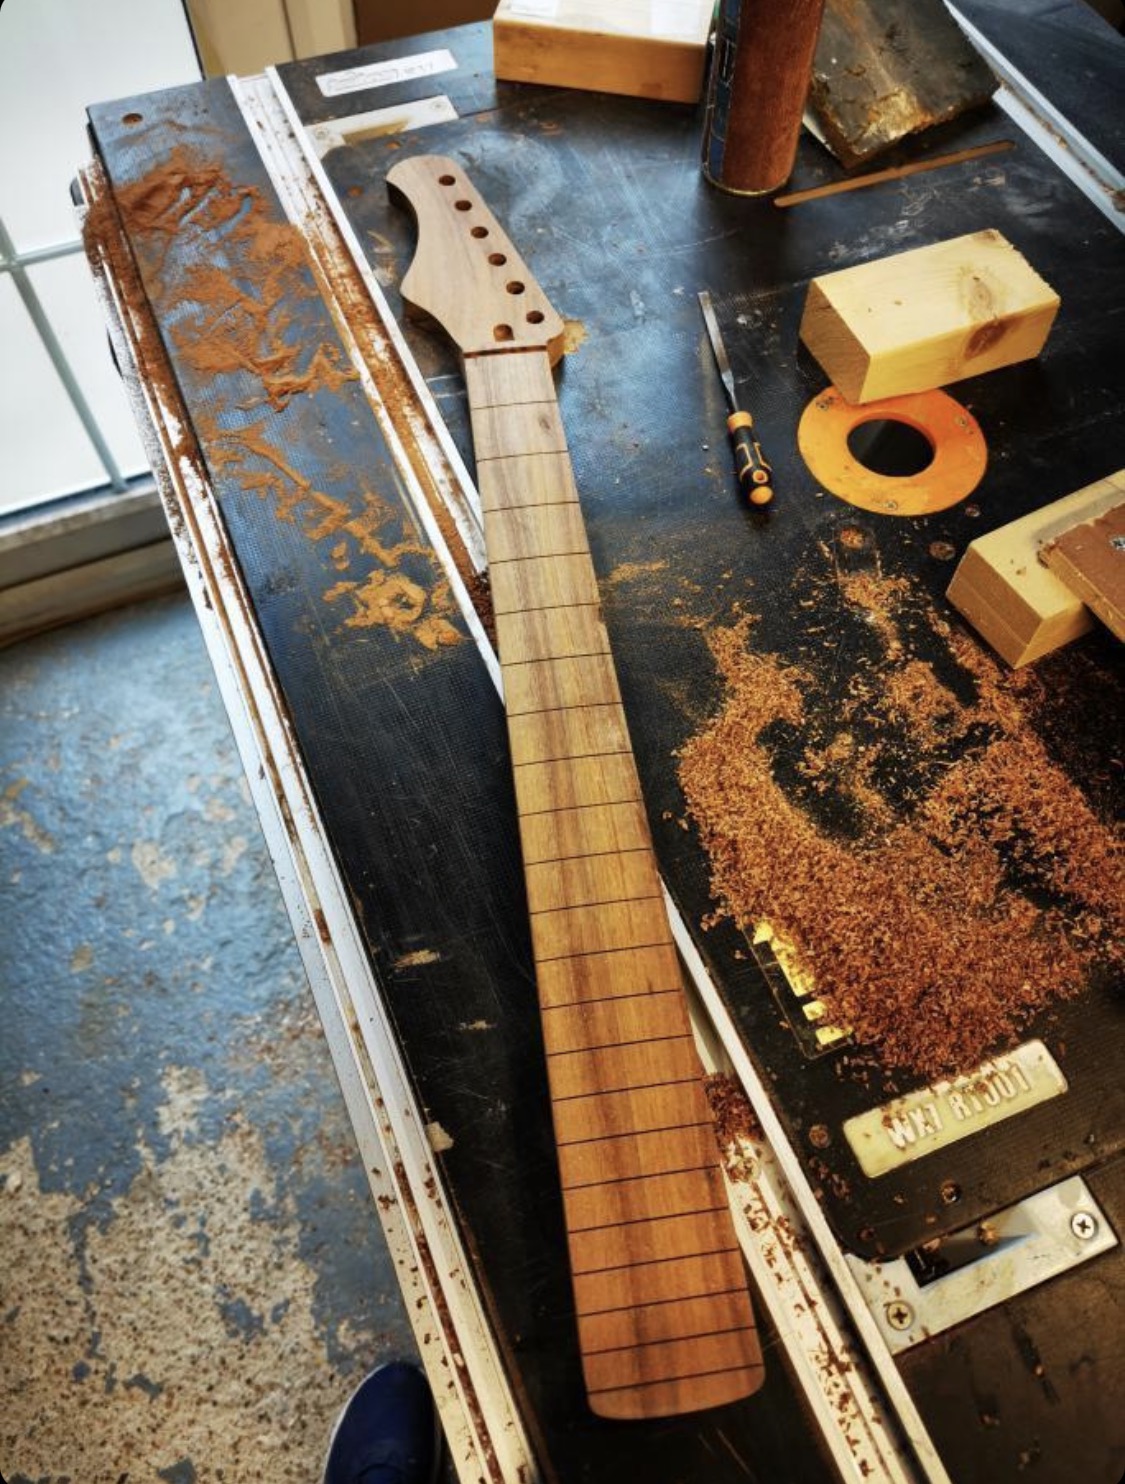
The frets and nut got installed. Not a lot to talk about here, just a standard fret job and a nut fitting. At this point, the frets have only put glued in as well with the nut. As we approach the final stages the frets will get all the fretwork and levelling as well as the nut getting those last few adjustments. For now, Lewis just got the frets and nuts in so that it was playable for me to test.
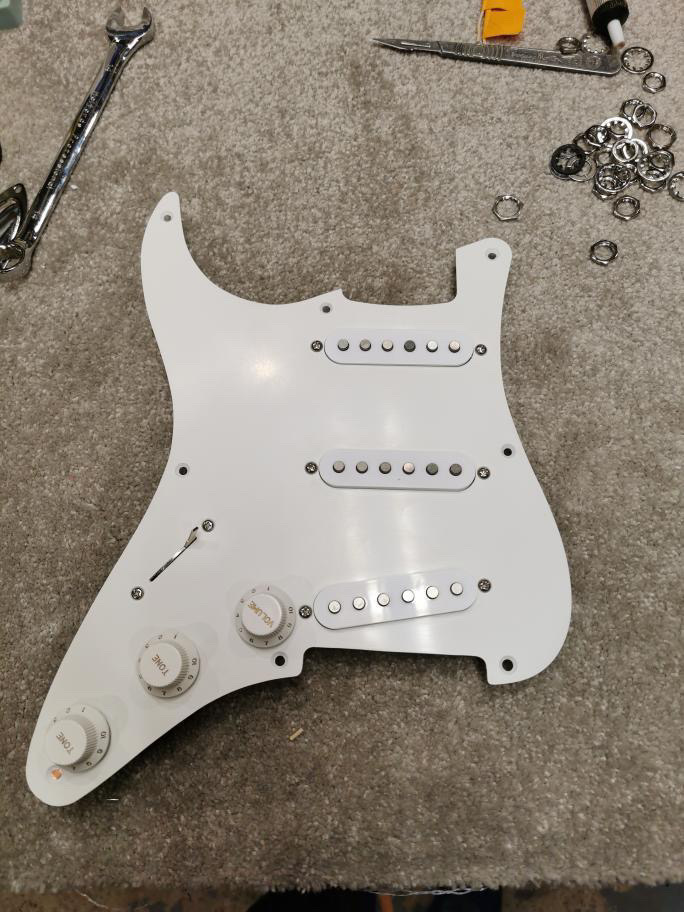
Due to the scale of the guitar and having to shrink everything a little bit, Lewis had to redraw the pickguard, He started off by placing a standard pickguard on the guitar and cutting away to make it fit. He had to make a few adjustments to get it to fit with the Babicz bridge as
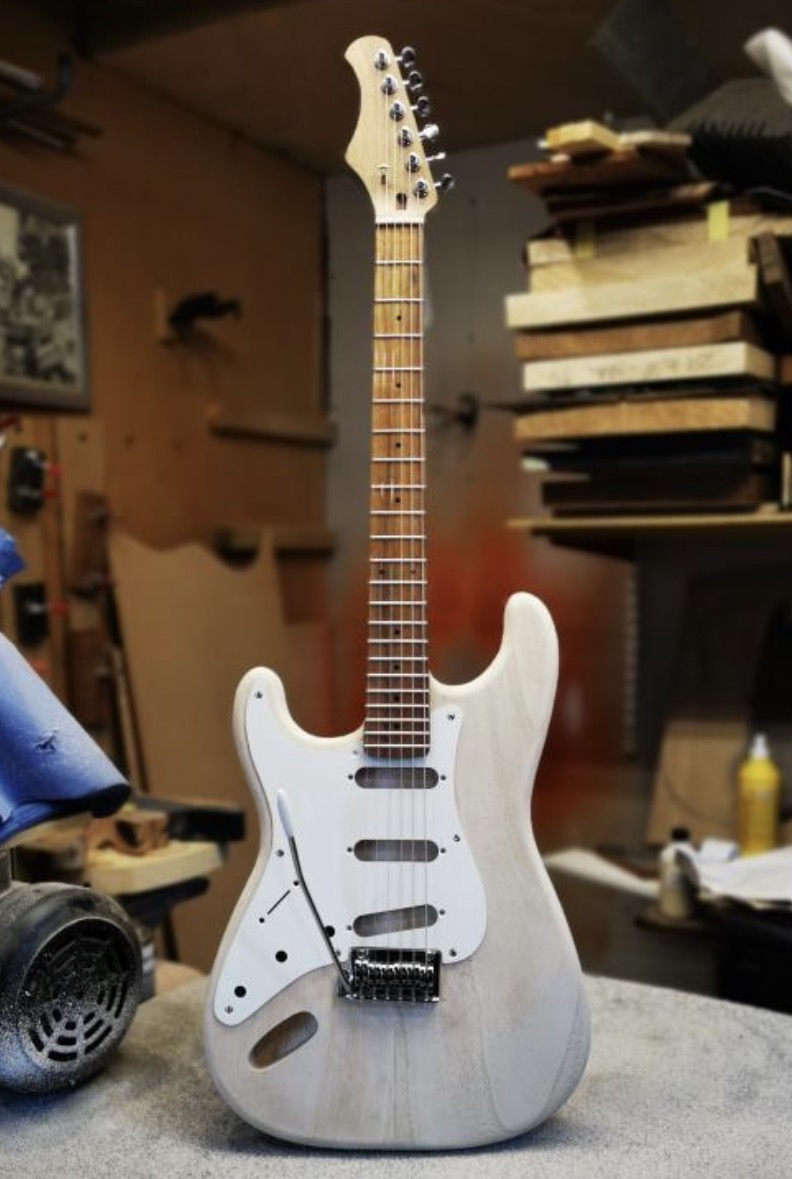
It was at this point that the British Boutique Guitar Festival was happening, so Lewis got the neck and bridge on, Put some tuners in and strung it up so that when I came down I could have a play on it and feel the neck and body and make sure it was all going as expected (It was at this point I started to get really excited). This was only a rough assembly, The guitar still needed a finish, Final fretwork and a full set-up. However, this guitar sang! Playing it acoustically it sounded so nice and so loud!
Stain and Finish
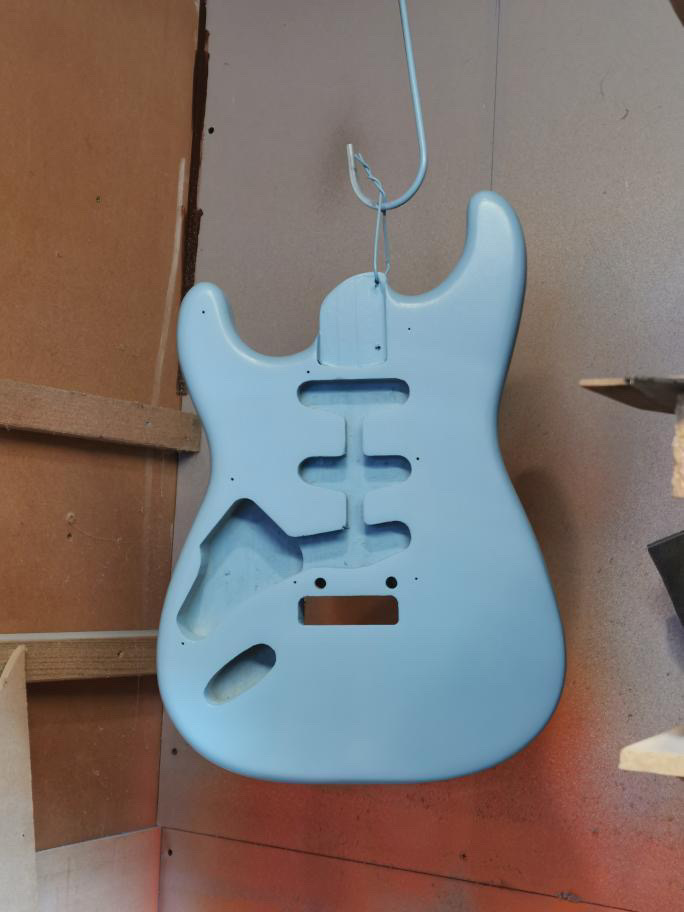
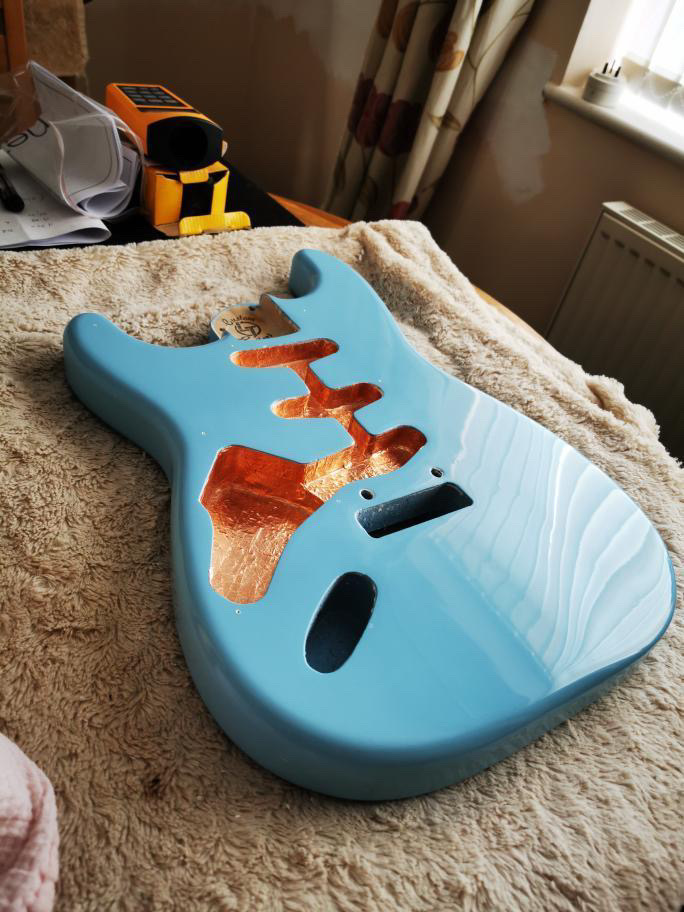
I always planned for the guitar to be a pale blue as I have always liked that 50/60’s blue colour. So when speccing the guitar with Lewis that was a must. Blue with the White scratchplate. The neck on the other hand, because it was had such a nice grain and looked so nice, we decided to give it a few coats of oil, this really brought out the grain and enhanced the look of the neck! It has to be one of the best necks I have ever seen!
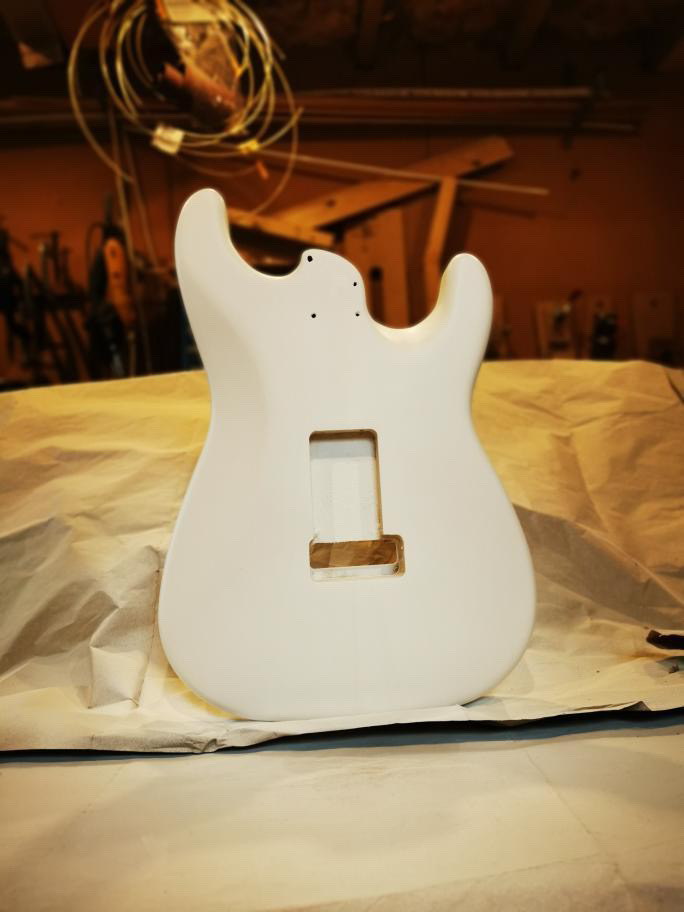
Once the body was sanded and ready for its finish (I was getting really excited now), he started with an undercoat of white. Then let this sit for around 5 days. Then he cut it back a little bit, just so that it was perfectly level for the main colour. After a few days, he sprayed the body with the main colour! Lewis applied several coats over the course of the day. After completing the coats he again let them dry and set for a few days. Then levelled it off and began the nitro finish.
Let’s get into the Nitro
Then came the nitro finish. Now, I want to talk about why I went with Nitro. One of the reasons is weight, Nitro is a lot thinner than a poly finish so won’t weigh much (going back to the point that I wanted a really light guitar). The second point was wear. I am a big fan of worn and used guitars (relicing is another topic). With a poly finish, you just won’t ever get wear on it. it is designed to be bulletproof and last. However, Nitro wears fast! And will evolve the guitar over time.
This is the main reason I picked a nitro finish. Nitro is not fun to apply (luckily that was all Lewis), it takes time to apply, and even longer to cure. Lewis applied several coats for a few days and then let the body sit and dry and cure for around 3 weeks. Before rubbing it back to remove any imperfections (and a quick spray to touch up a few areas) and then lightly buffing it out. Once this had been done it was time to assemble the guitar and give it a full setup.
Wiring and Electronics
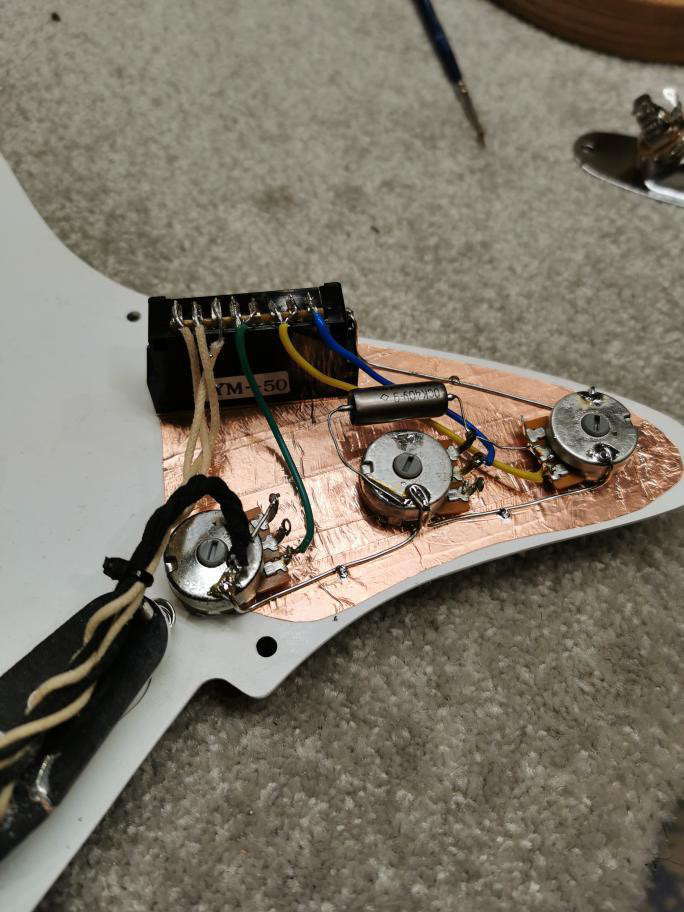
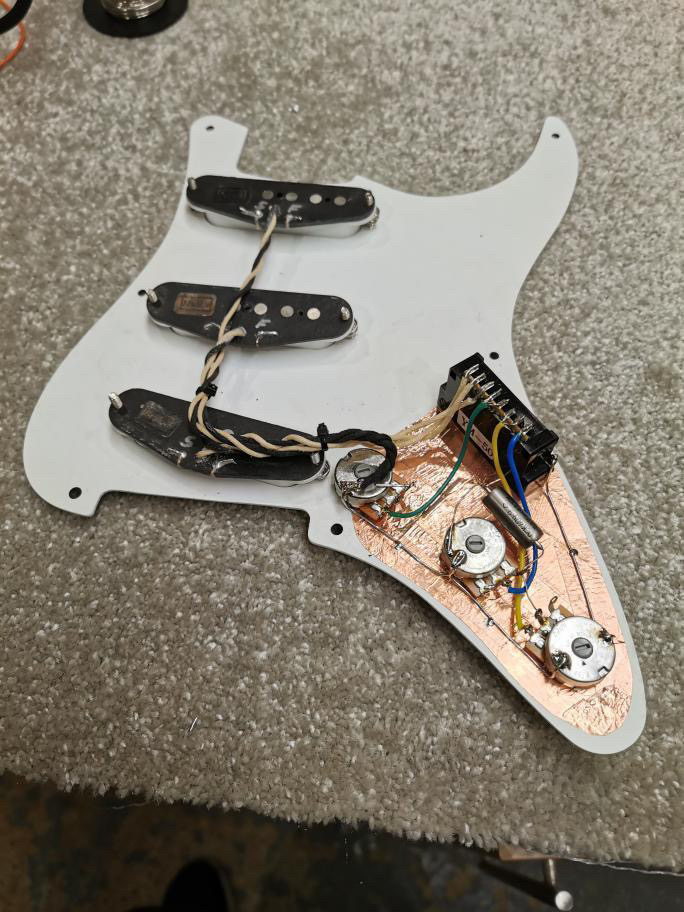
Lewis quickly put together the load in, Using Omega pots he wired up the Alchemy pickups with the two Tone and one volume and a 5-way selector switch. The standard Stratocaster configuration. He has used copper foil to line the pickguard and also the cavity. Being a single-coil loaded guitar, we want to prevent hum as much as possible.
Something else that is worth noting is that I have opted to use right-handed pots. If you are left-handed you will understand this but most left-handed guitars are made with right-handed pots (cheaper and easy to source), because of this the tone and volume pots are “the wrong way round”. This is something that I have got familiar with due to playing many guitars with this issue. So I have opted to have them on this guitar as well.
After Lewis had polished and finished the paint and finish, Wired up what he could, it was time for the final assembly and the final bits of set-up. He put the loaded pickguard into the body (a huge advantage of a Strat is being able to take everything out fairly simply). He then attached the neck and began the fret levelling, polishing and final set-up!
Once the custom guitar build was all completed it was then time for collection! It just so happened that Lewis finished the guitar at the same time as a guitar show (Birmingham Guitar Show) was on, so we arranged the collection at the show! So, we can now go through the final look and also do some sounds!
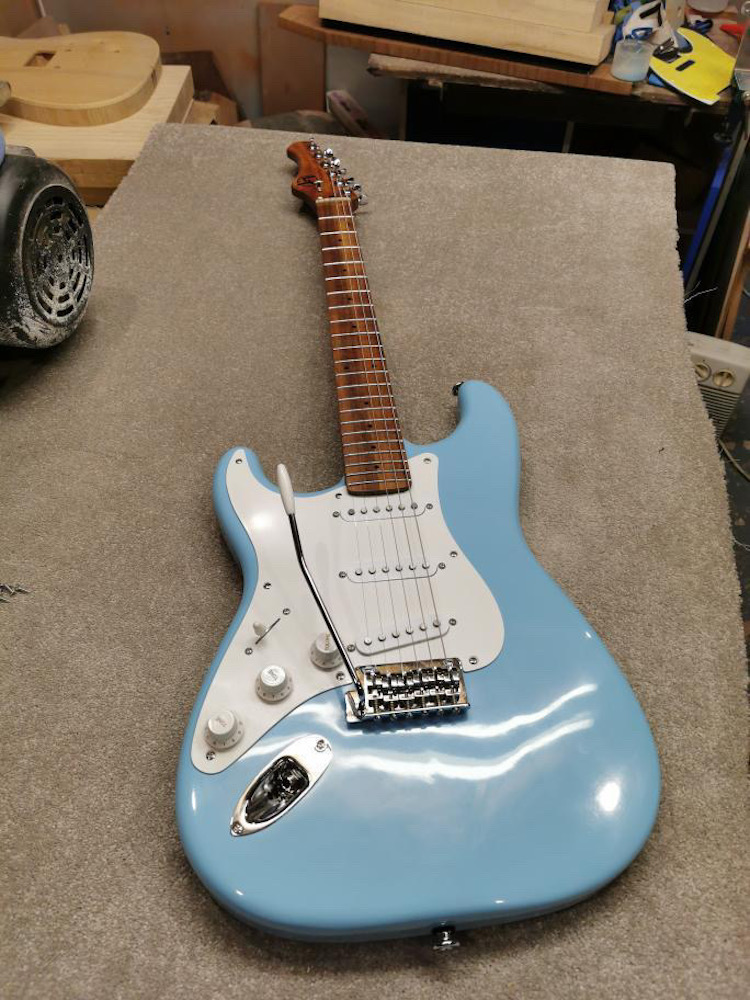
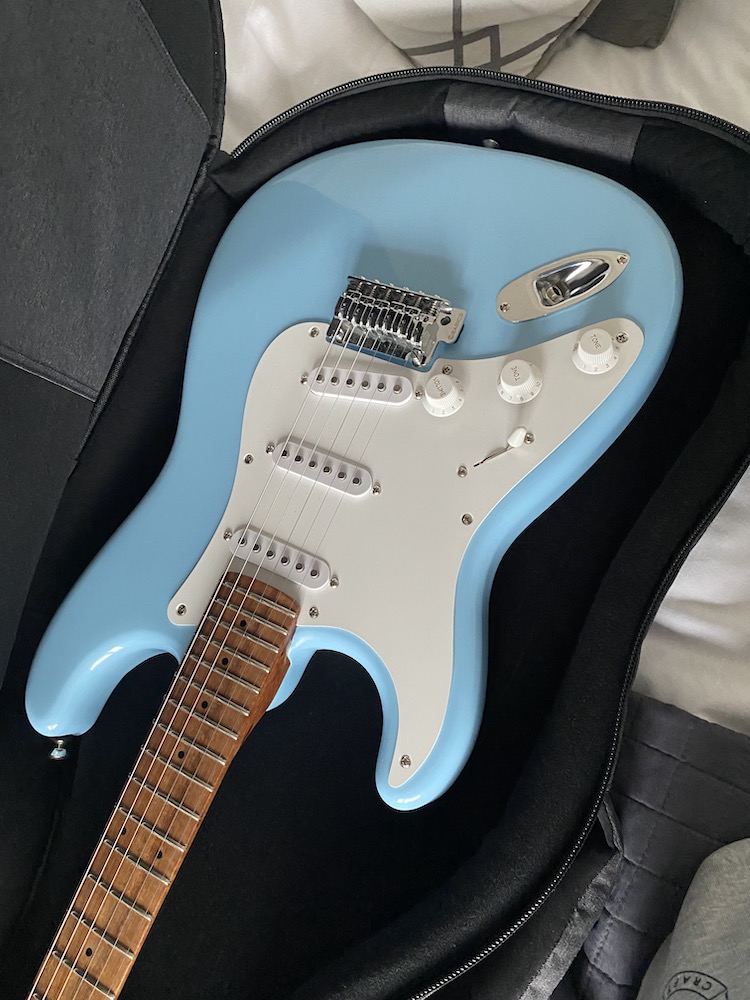
So this is it! My finished custom Strat guitar. I am so happy with it, it came out exactly as I wanted it to. I may be a bit biased but everything about this guitar is perfect! The feel, the weight, the finish but most importantly the sound! The Alchemy Pickups in this guitar have come out amazing! Lovely Strat tones to be had, with positions 2 and 4 giving those famous tones that people love.
One thing to note is that the guitar came out at 5lbs. To put that into context, my Epiphone 335 weighs 7.5lbs. So this solid body Stratocaster is lighter than a semi-hollow guitar.
Time for some sound clips, below is a video with a quick song I put together, It is very funky! That position 2 and 4 on the pickups is just heaven! All sounds were recorded using the Strat into my D20 using direct out with a 4X12 cab simulator. For the solo, I used my Klon Clone (Review here) for a bit of grit. And that is it. None of the guitars have been mixed (Except for a low cut at around 100hz). What you hear is what was recorded. The first playthrough is the full track and then following that I will remove the backtrack so you can hear just the guitars.
If you want to see and hear some more content with this guitar, you can click through to various reviews below. We have recorded loads of content with this guitar.
So why did I get a fully custom Strat in the first place? Well, I wanted a workhorse of a guitar. I wanted a guitar that would be suited for gigging and sounded good in almost any situation. However, I was also after a guitar I felt comfortable on and also wasn’t too heavy or hard work to play. No point in making things hard for yourself. So this led me down the line to go custom and get exactly what I want.
Don’t be fooled, this guitar won’t be babied, it is going to be a workhorse and play a lot of gigs and get played a lot! It will be getting used and of course, it will pick up knocks and nicks but I am ok with this! That is what it was made for!
There will also be lots of content with this custom Strat guitar on the website and our Instagram! Plenty of use in other articles and reviews!
Conclusion
It has always been a dream of mine to get a fully custom guitar build. It has finally happened, massive thanks to Lewis for building such an incredible custom Strat for me, and also sticking with me while I came up with this wild idea in the first place. The guitar has come out perfect and I couldn’t be happier with this custom guitar build, I haven’t put it down since getting it and have been making so much content! (Which you can check out on our Instagram).
If you are after a custom guitar build you can check out LT Customs at the link below, Also if you are after some new pickups I highly recommend you check out Alchemy pickups below as well! They create some amazing pickups at a fantastic price.
For now, I am off to go play this guitar a bit more and also a film for some more reviews that we have coming up! Be sure to stick around for more of those.
8 thoughts on “My New CUSTOM Strat! – Going FULLY Custom with LT Guitars”
Comments are closed.