The Ultimate Telecaster Build - Could it be better than Fender?

Telecaster Build – The Introduction
So how did this telecaster build start?Well, Two or three years ago I purchased a left handed Squire Affinity Telecaster. At the time the guitar cost me £130. Why did I buy one? Well, I once played a “USA made” Telecaster in a music shop and fell in love with the guitar. I needed a telecaster. Now, unfortunately, left handed telecasters are expensive. So I thought about a cheaper alternative and stumbled across the Squire Affinity range. I liked the look, liked the price, so I bought it.
When it got delivered I was happy. I had a telecaster. It played ok and sounded ok, exactly as I expected for the price. Skip forwards around 6 Months and I decided to try to relic it. Now, straight out the gates, lacquer and relic don’t go well together. It is very hard to relic a lacquered guitar. Anyway, I did my best and continued to play it.
A few weeks ago I decided that it was time to get a proper, amazing sounding and incredibly playable telecaster. However, I still didn’t want to spend all the money on an American made one. I did still have this old Squire telecaster laying around, and so the project began. Time for the Ultimate Telecaster build!
Now, this is going to be a long post so please use the contents below to find your way around the post:
Contents:
Telecaster Build – What was my Goal?
My goal for this telecaster build was simple, to create the perfect Telecaster, One that would be better than any of the shelf Fender. Had to look amazing, sound amazing and play perfectly. It also had to be reliable and perfect for gigging, but not so perfect that if it got a dent or a ding I would be heartbroken. I knew this was going to take time, a lot of help and money. I didn’t set myself a budget, I just wanted to spend as little as possible while getting the best results. What was first the list? The looks! Time for an all-new paint job!
Treating it to a Full Respray!
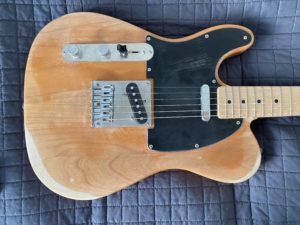
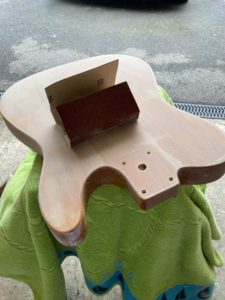
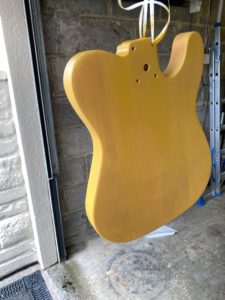
The first job was to get rid of this DIY relic job I tried. I was fairly happy with the relic I tried on the butterscotch but I was now after something more, bold and punchy. This is the great thing about cheap Mod projects, you can chop and change as you want. So the first stage to this Telecaster build is a full respray!
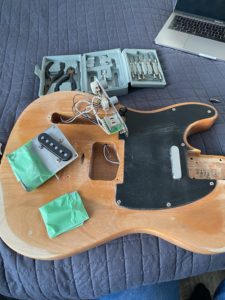
I full dismantled the guitar, I wasn’t too careful with the electronics as I knew it was going to be fitted with new everything. Only thing I needed to keep was Volume and Tone knobs and also the control cover. Apart from that everything was going to be new.
Once the guitar had been dismantled I sanded the guitar down, a lot! I spent a long time going through various grit Levels to get as perfect as a base as possible. There were a few chips, dings and deep scratches in the guitar, but I wasn’t too worried about those. In my mind, I wanted a kind of used look to the final look. Once I had sanded the body and neck fully, I used a tack cloth to wipe over everything to remove as much of the dust and residue as possible.
Primer:
Next was a primer. Now, as I said I did have a few dings and dents, so I decided to use a filler primer and apply a few coats. I applied around 3-5 coats. First few coats were light coats but the final 2 were fairly heavy and applied thick. Avoiding runs as I went. I then left the guitar body for a full 24 hours before sanding the primmer down smooth, I was rather impressed about the Filler primer and how well and smooth it came out the can. I used a very high grit sanding block and sanded the whole body until it was as smooth as glass. As mentioned before, there were still a few dings and dent but some of the lighter ones had been filled in with the primer.
Let’s get Purple!:
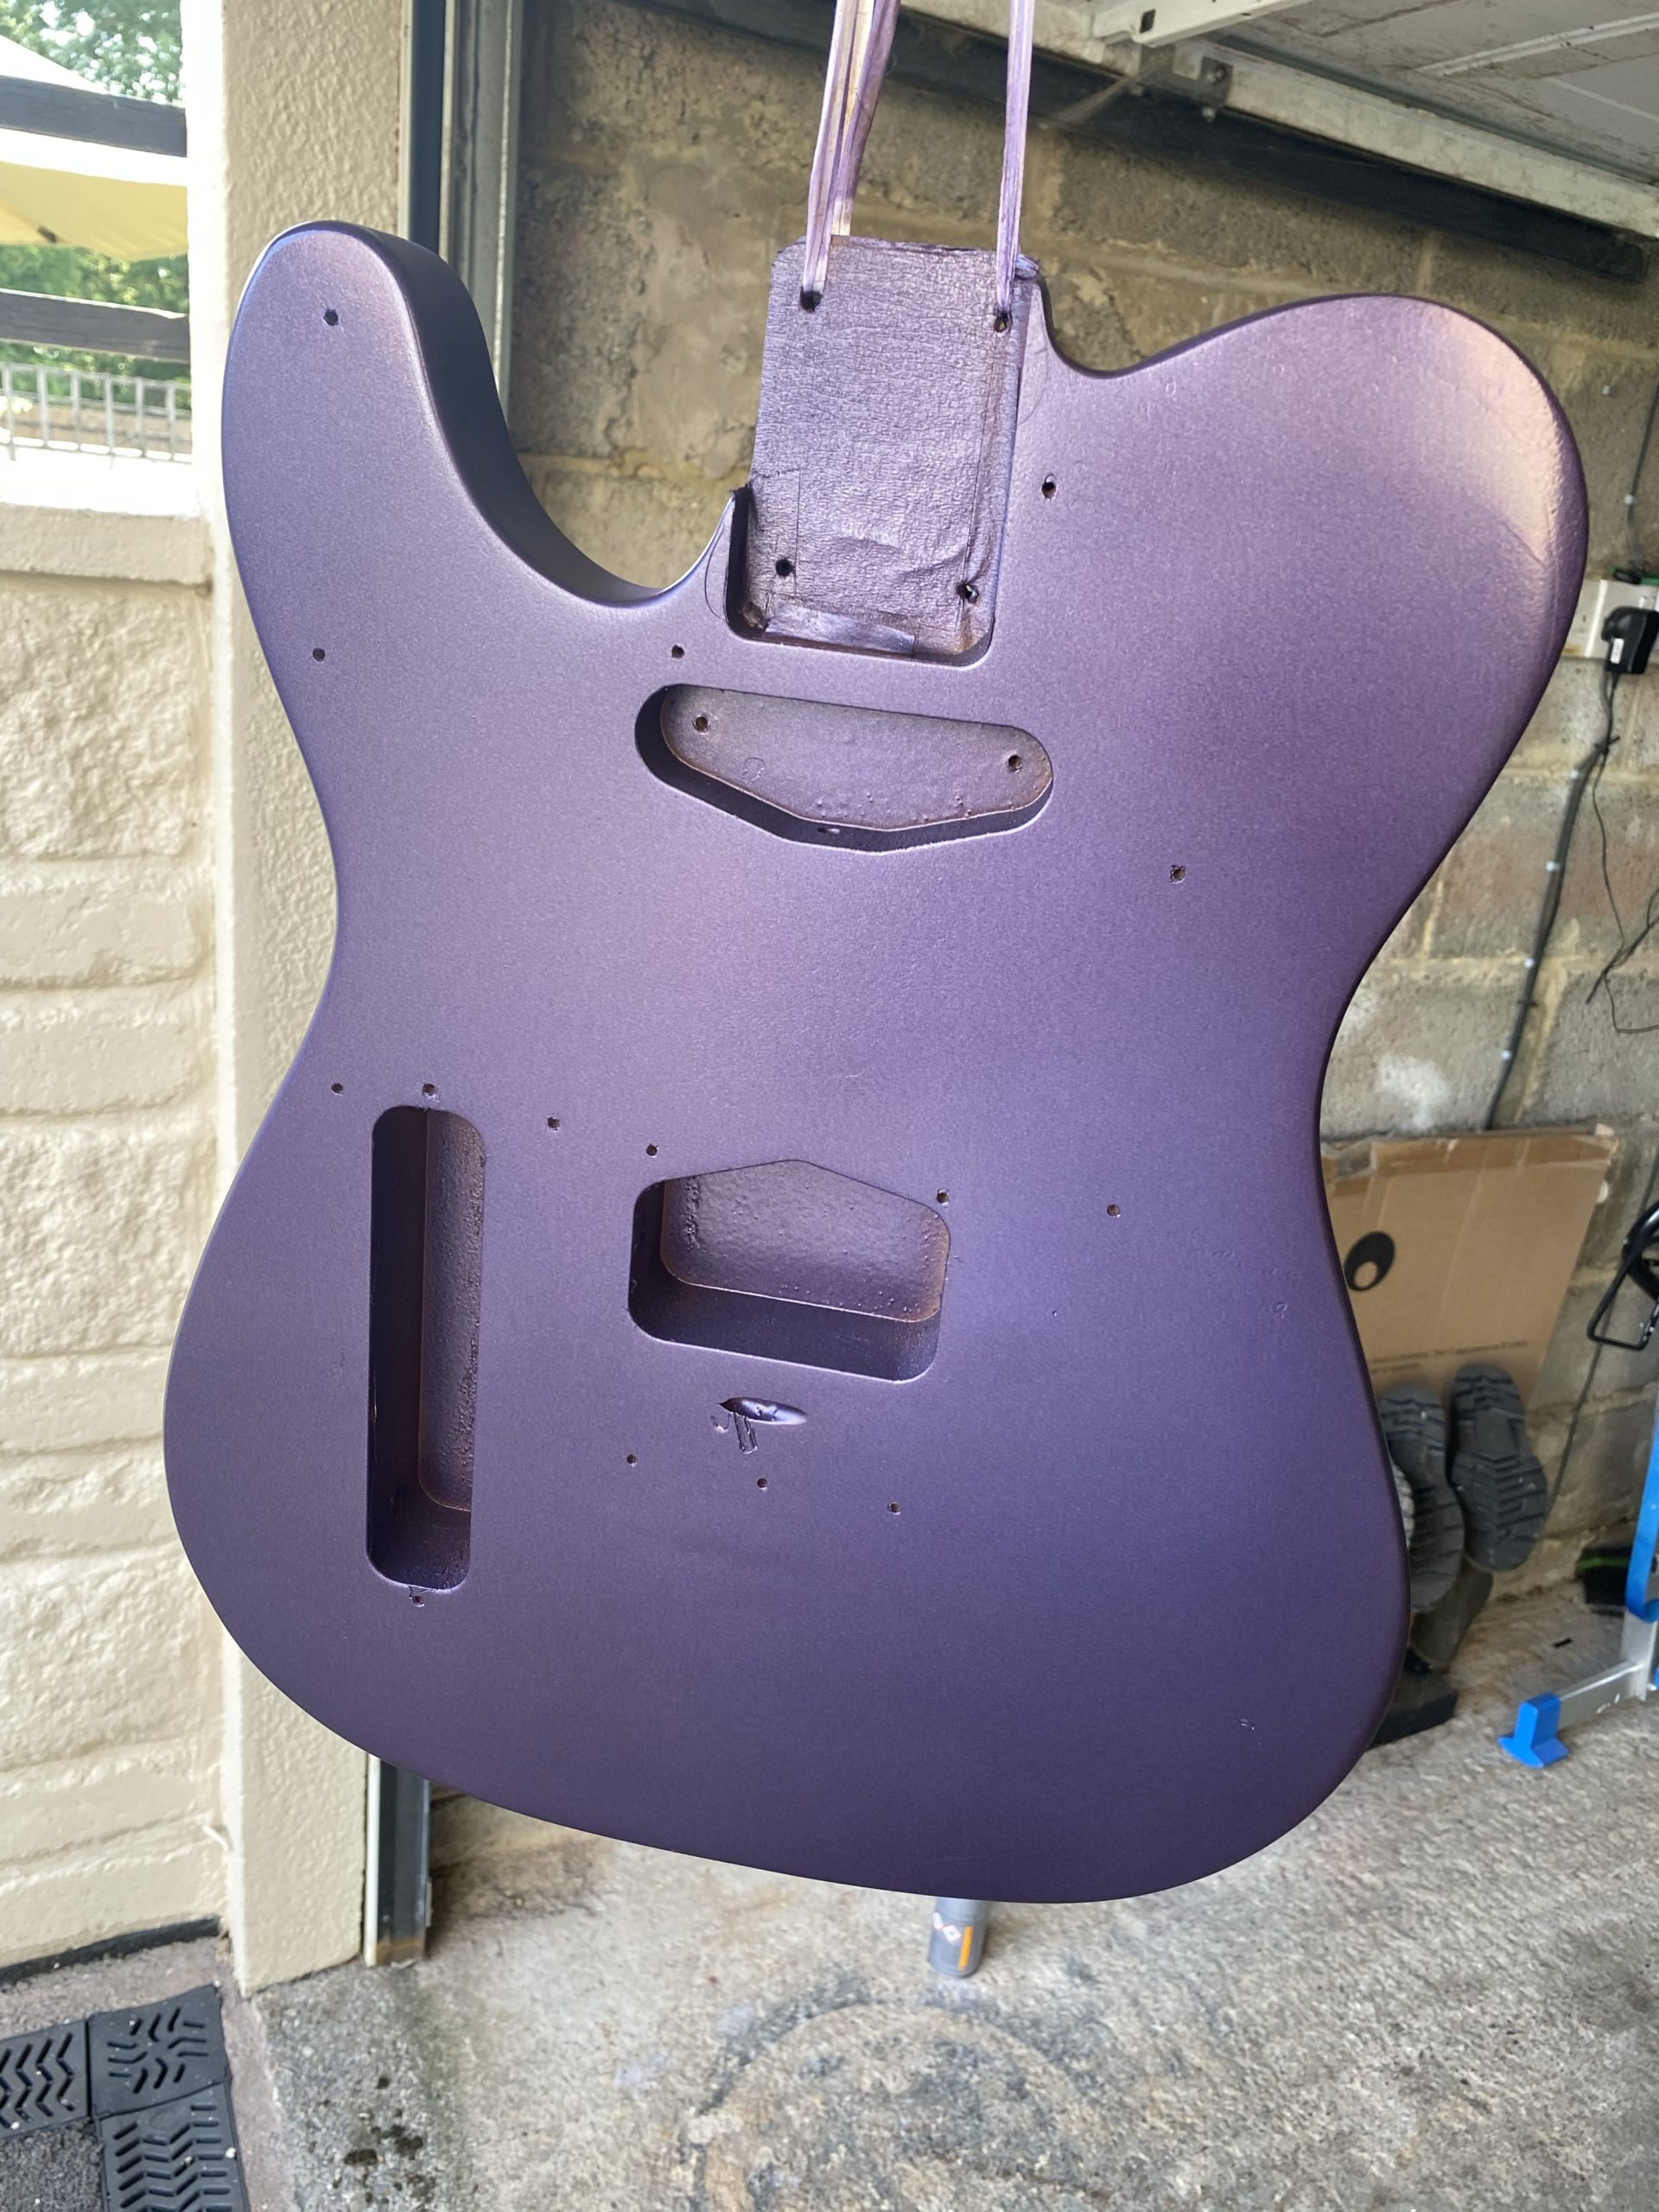
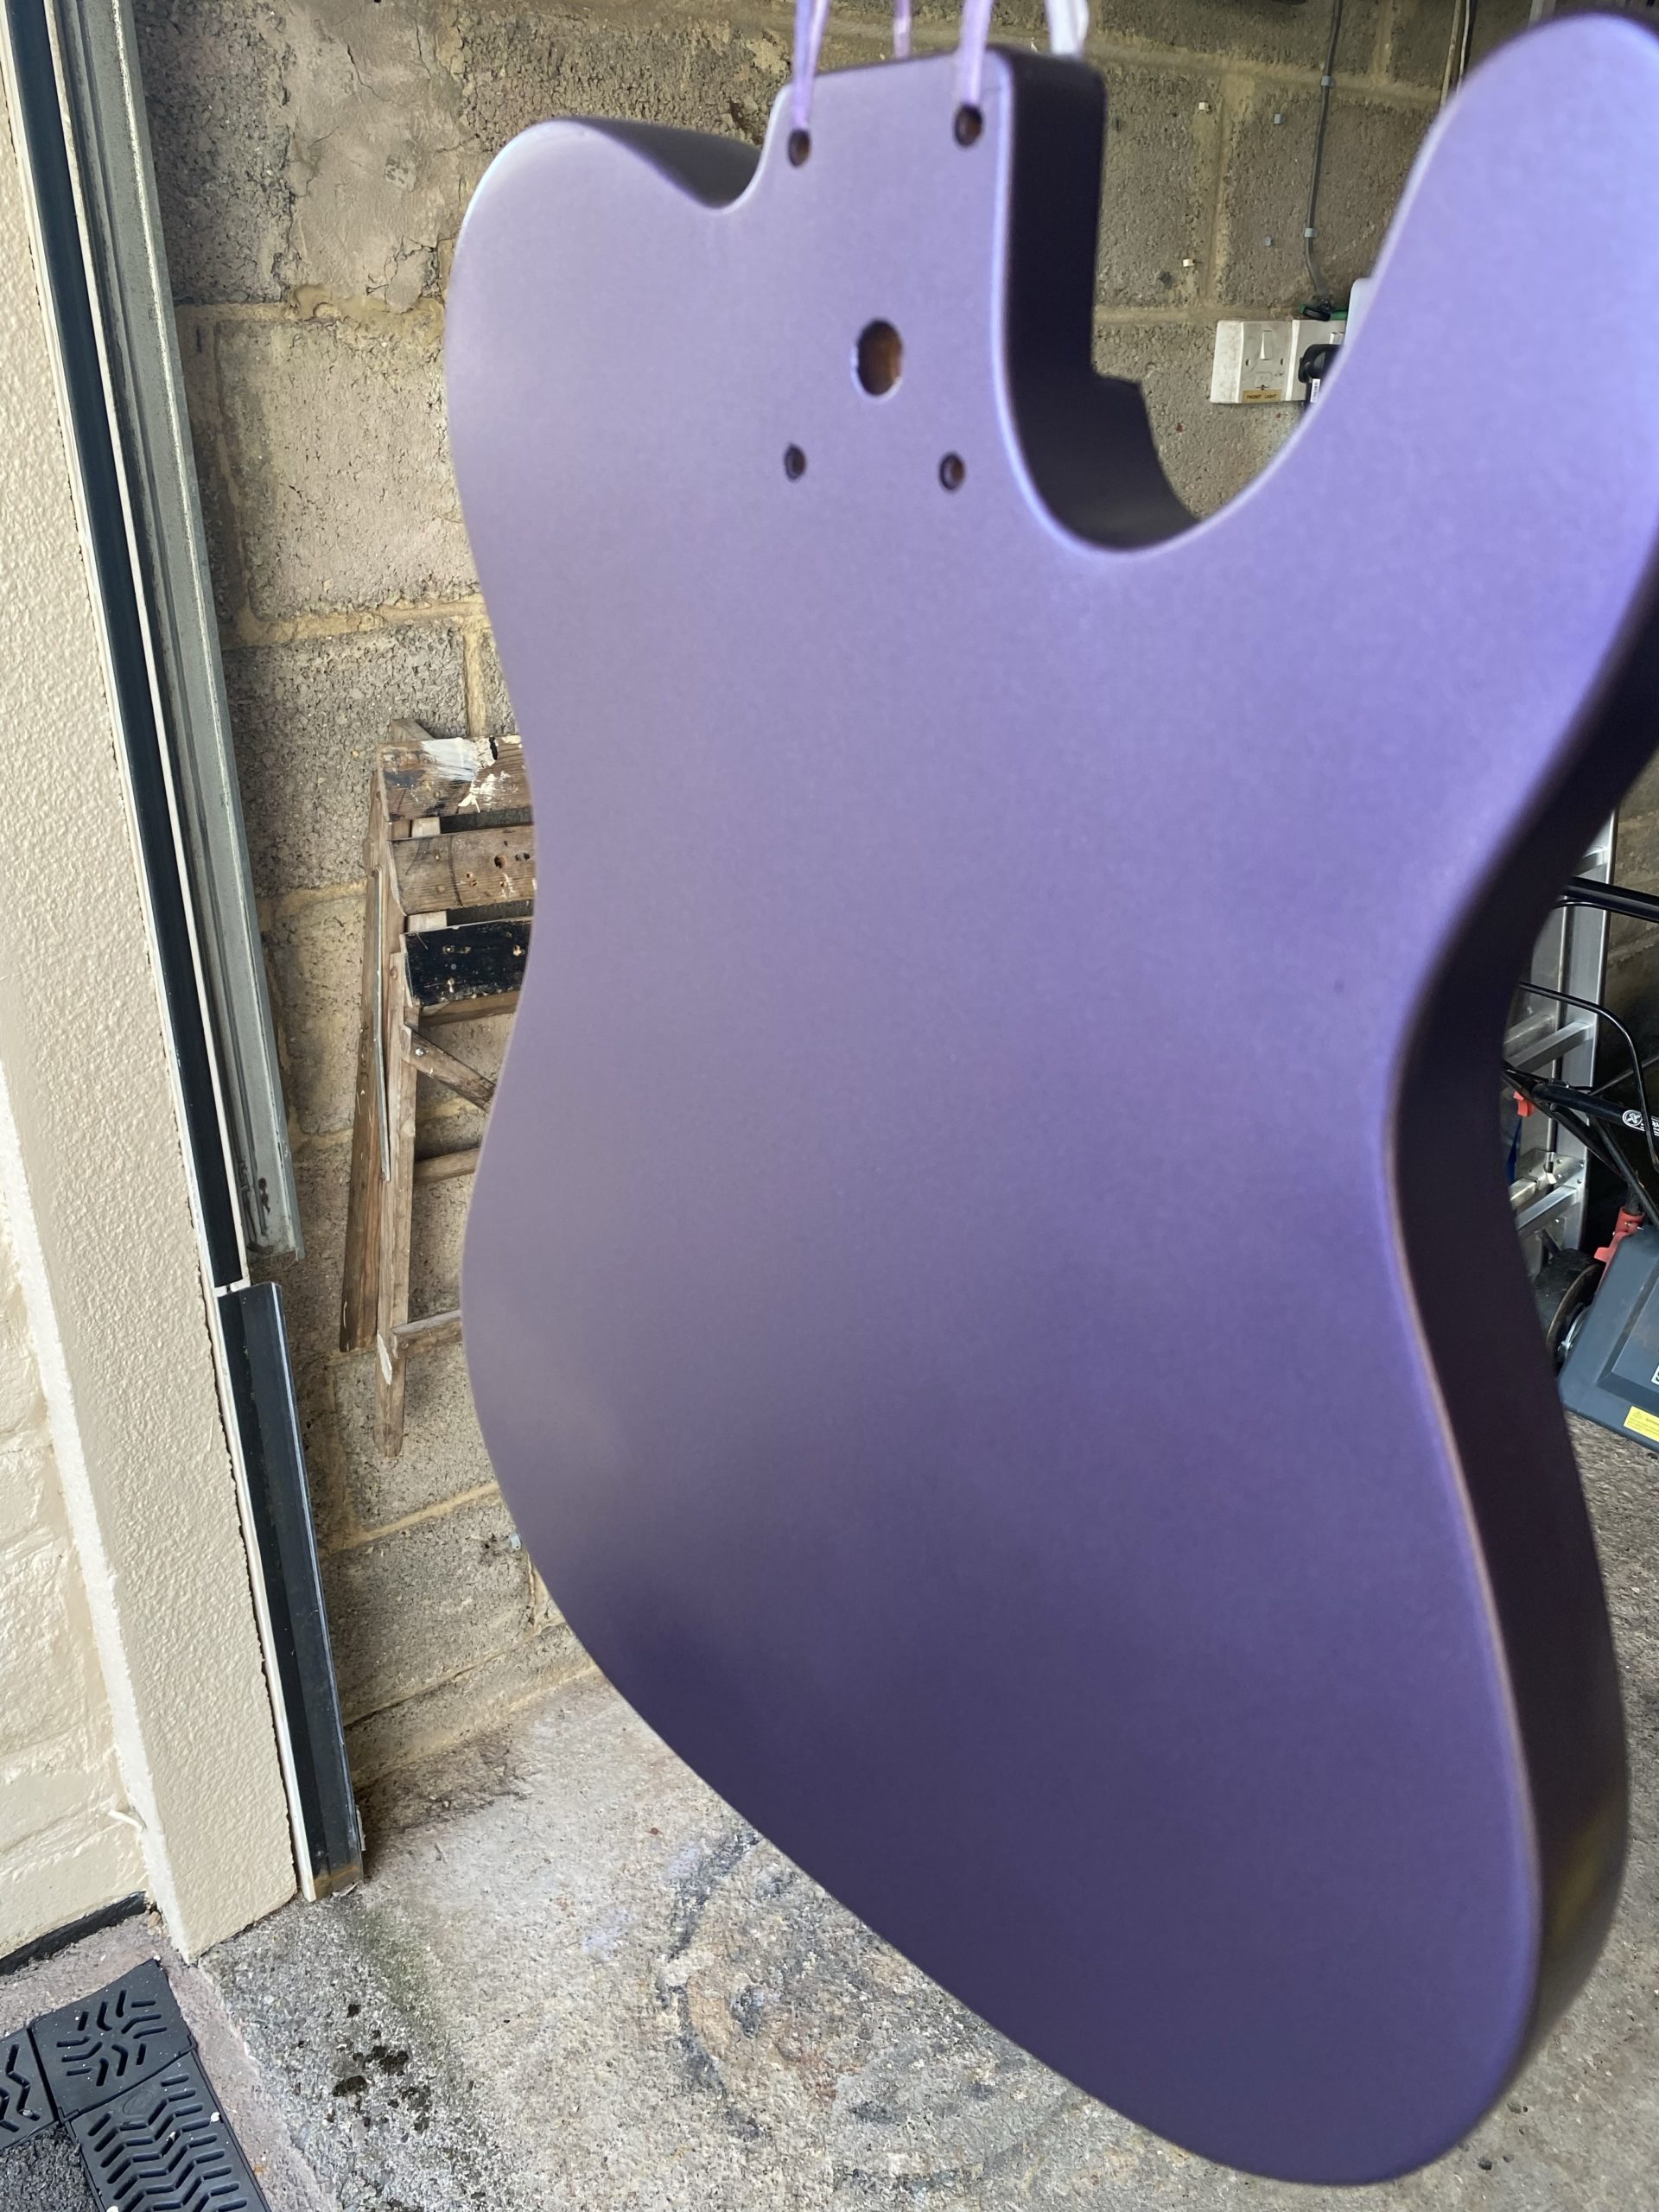
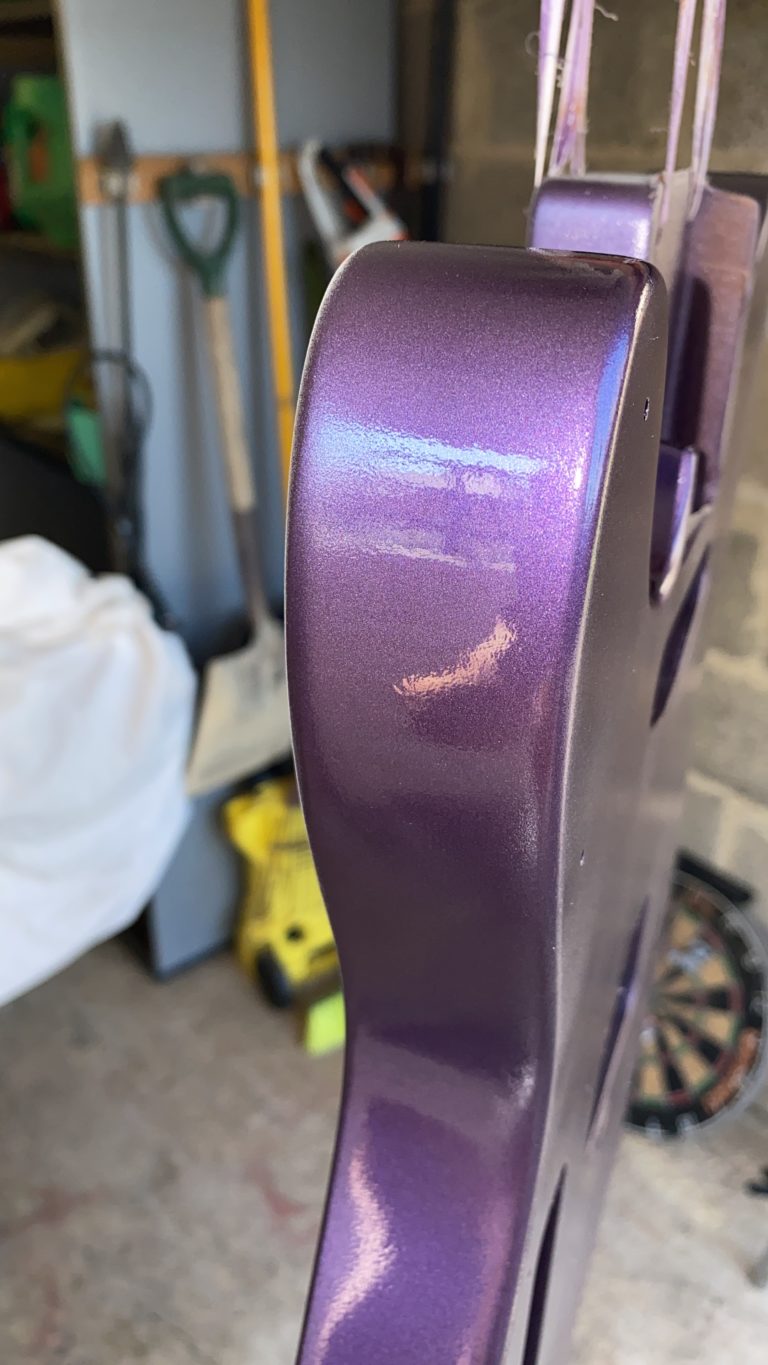
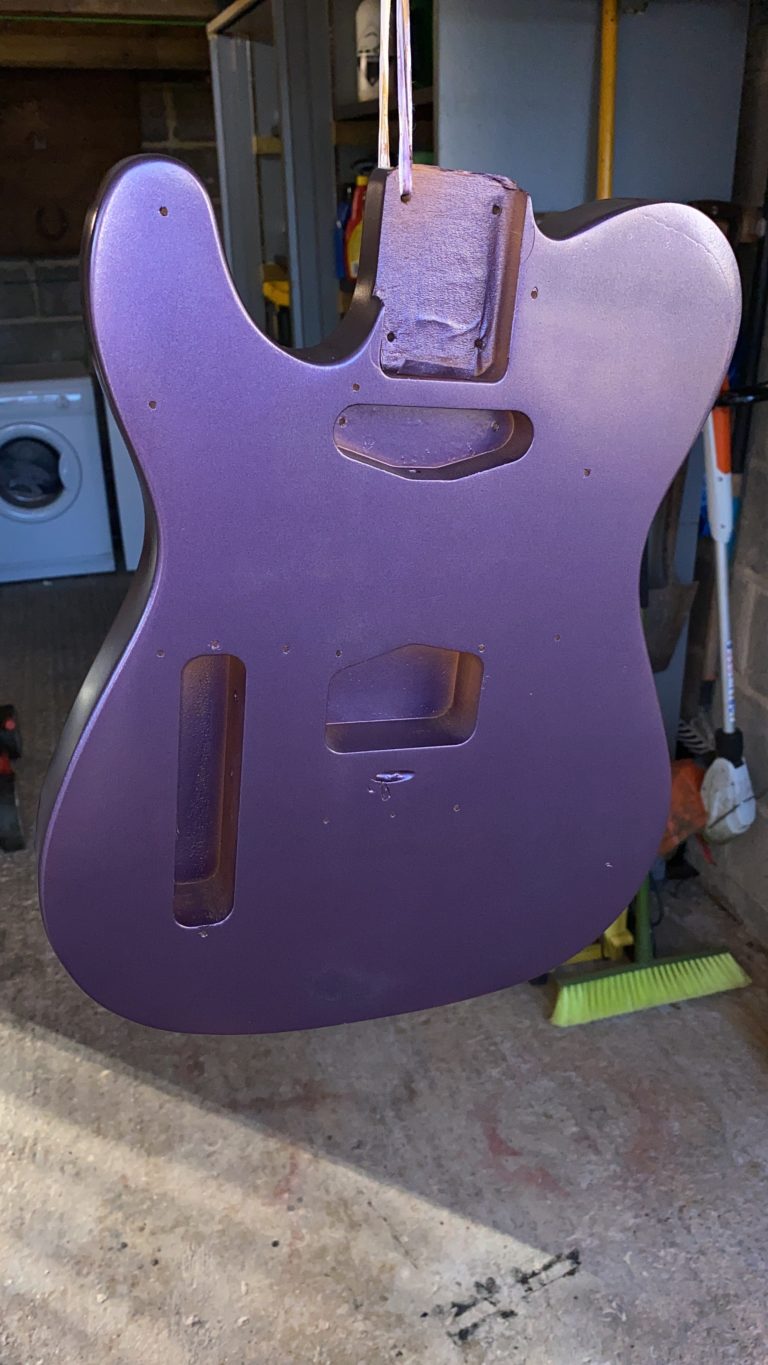
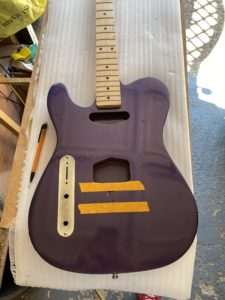
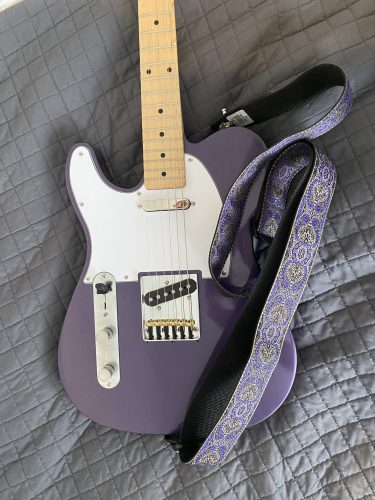
After wiping the whole body with a tack cloth again, It was time to apply the colour. For the colour, I went with a “Ford Purple Velvet”. This was a metallic purple spray paint which I purchased from my local automobile shop (Halfords). As with the primer I decided to apply more coats than needed. Few 3 coats were fairly light, what I would call a dusting. Then the next 3-4 coats were a lot heavier, again avoiding runs. Once I applied a few coats the colour started to pop and come alive. I was really happy with the colour I went for.
Once I had finished all the coats of colour I once again left the guitar for 48 hours to dry fully. I then, again, gave it a light sanding to get it smooth. As with the primer, this spray paint went on fairly smooth and didn’t require much sanding. Then it was time for the Lacquer (my Least favourite part).
Let’s get Shiny:
Going to start by saying, I don’t like Lacquer. Hate spraying it and it always runs. Saying that to get the full effect of the purple metallic paint, you had to apply a clear coat. Personally, I didn’t follow what I had been doing and do a few light coats and then heavy ones. I gave it a good 6-7 light coats. Once it started to shin and get a gloss finish I stopped. For this project, I wasn’t going for that brand new, hyper shiny look, as I mentioned above I wanted to have a used look and for the guitar to wear nicely. So I stop as soon as it started to shine.
Now, what you are meant to do next is wet and dry the lacquer and polish it up. However, as I didn’t apply a heavy amount of lacquer I didn’t want to sand it all off, so I decided to skip this step. Looking at the finished guitar now, there are a few rough patches but overall the finish is very nice and I am very happy on how it turned out. Once I had finished the lacquer, I left the guitar for a full week. Hung it up and didn’t touch it.
Now it is time for the rebuild. Think we should go through the parts list.
Plans for hardware!
Now, I did have a few plans for the hardware, a few upgrades I wanted to make. By a few I mean almost everything!
Tuners:
I wanted to upgrade the tuners, I wanted to go for locking tuners, as I tend to always do on my guitars. The issue being left handed chrome tuners were hard to find. Luckily, Lewis had a set of Kluson Vintage tuners laying around, so I had them. These weren’t locking but had the centre hole to place the string. Sort of semi-locking. Plus Kluson produces very high-quality tuners. I was a happy bunny.
Strap Locks:
As I have mentioned in a previous blog, I put strap locks on all my guitars. I like to have peace of mind. This project was no different. So I bought a set of Stagg Chrome Strap locks from Amazon. They were around £12. Very cheap and easy upgrade. While I was at it I also ordered a new Purple Ernie Ball Strap (Everything has to Match).
Pickups:
After a big discussion with Lewis from LT Custom Guitars, we decided to go for a set of Alchemy Custom Pickups. We put the order for the pickups in and they were custom made for me. They came out at 10.5k on the neck pickup and 15.6k for the bridge pickup. These were some hot Pickups. The cost for a set of these pickups was £100. This Tele was going to be a beast. The pickups are what made this Telecaster build! We will be doing a full review of these pickups.
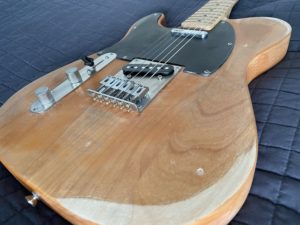
Bridge:
I wanted to upgrade the bridge on this guitar and the stock Squire bridge isn’t the best. I wanted brass saddles for more sustain and better tone and sound. This is where I hit my first issue. Finding a top-loaded bridge (Due to the Squire Affinity Tele not being a string through) is rather hard. I couldn’t find any good quality top-loading bridges. However, Lewis came to the rescue, he had a bridge laying around that had Brass saddles, so I had it! Unfortunately, it still wasn’t top-loaded.
Lewis said, no worries, we will just have to make the Squire a string through! And that was that! That was going to be a huge upgrade and make a massive difference.
Pick guard:
The Squire came with a black pickguard, which wasn’t going to go with the new purple paint job, so I ordered a left-handed 3ply white pickguard. Side note, it is really hard to get hold of left-handed telecaster pickguards.
Electronics and Wiring:
As were replacing the pickups we thought it would be a good idea to replace all the electronics (pots, switches and Jack) with high-quality ones. We also went for some braided cable for all the connections. The electronics were going to be of a higher quaintly than what Fender would use. Again, this Tele is going to turn out to be a beast.
The Rebuild!
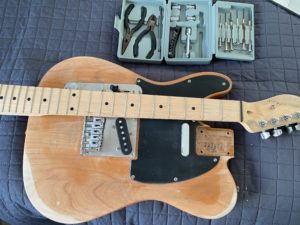
First Steps
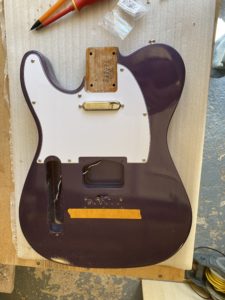
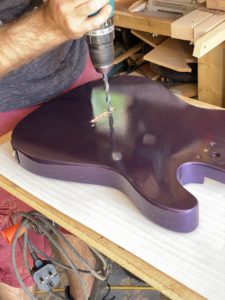
It was time to rebuild this telecaster build, Lewis first started by making the guitar a string through and fixing the bridges. We had a few issues during this part, well, I say we, mainly Lewis. See below for all the issues we had during the rebuild. He started by first making the guitar a string through, Drilling the holes through the guitar and adding the string ferrules into. Just by doing this, he made the guitar look so much more expensive than it was. After doing that he then managed to get the bridge fitted and aligned. It was starting to take shape. I was getting excited!
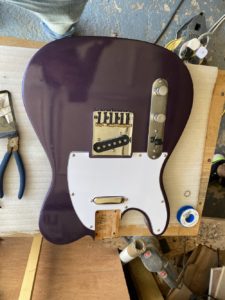
Pickups
Once we were both happy with the bridge it was time to get the pickups mounted in both the bridge and the pickguard. This was a fairly simple process, everything lined up and looked lovely. We all know that getting that spring and screw to cooperate when fitting pickups can be a pain. If you have ever fitted pickups then you know what I am on about. It can be a right pain! The pickups were mounted it was starting to look like a guitar now!
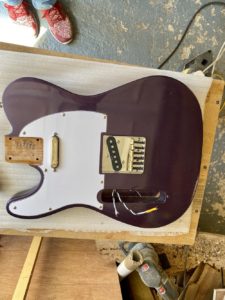
Wiring
Next was to wiring it all up! Using all the new pots and new cable Lewis went about using his amazing soldering skills to do some of the cleanest and tidiest soldering I have ever seen. After he was done soldering all the Pots up he then soldered the pickups and ground cables and then screwed everything down. Using a screwdriver he was able to test if everything was working as it was and of course it was.
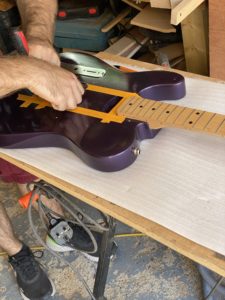
Fitting the neck
We were now entering the final stages of the telecaster build. Time to put the neck on, which is simple enough as it is a bolt-on neck. Before we put the neck on we put the new Kluson tuners on. Then bolted the neck into place. We could then string it up with String Joy Strings (Review Coming Soon). Lewis then checked the neck and found that it was dead straight. So he adjusted the neck using the trust rod.
Fun fact, this is something I learnt, if you are planning to have the strings of a guitar neck for a while, loosen the truss a bit. Helps look after and protect the neck.
Set up
The guitar was now fully assembled and looking incredible, the pickups, paint job and everything had come together to make one mean looking guitar. Lewis gave it a quick set up, making sure the action and intonation were correct. This can take some time as you have to adjust, check then adjust and check. Eventually, it all falls into place and it was time to give it a test.
Sound test
We plugged the Telecaster into an Orange Combo and started on a clean channel. WOW! This guitar was incredible, the tones were pronounced, clear. The pickups were wound hot but it still had the telecaster sounds. Super clean and warm on the neck pickup but switch to the Bridge and you got that telecaster twang.
Switching the amp to a dirty sound is where this guitar and these pickups come alive. Full volume on the bridge is a great overdriven lead sound. Whereas the neck is a warm blue sound. However, rolling back the volume allows the guitar to clean right up and got to a glassy clean sound. Click here to read a full review on the Alchemy Pickups (Coming Soon).
Issues we had:
We did have a few issues while building this guitar. First one was hole and screw size. Some of the parts we were fitting had bigger screw sizes. This was a minor issue and easy to overcome. The Volume and tone knobs didn’t fit the shafts on the pots, so they had to be filed down to fit.
We also had an issue with the cavity for the bridge pickup being ever so slightly bigger than the new bridge. It isn’t an issue unless you look close. There are also a few leftover holes from the old bridge. We were going to fill these but after fitting the new bridge, you couldn’t see them. Plus it adds to the used look and feel I was going for. I didn’t want to chase perfect with this project, I wanted a guitar which could be used for gigging and wouldn’t matter if it got the odd chip or scratch.
However, on the whole, the project was fairly simple, and not a lot went wrong. So, how do I think the project came out? The finished guitar?
The Result!
The result of this telecaster build is incredible. I honestly believe I have a guitar which is better than any fender you can buy off the shelf. The pickups are incredible, the look and feel and set up are just perfect. If I was going to custom order a Telecaster from Fender, this would be what I would order. However, I don’t need to, because I have the perfect one now! All for under £300!
The control you get from the volume and tone pots are outstanding. I also put some new String Joy strings on it which we got sent for review (Review Coming Soon), From first impressions, the set that I put on this guitar are lovely, really nice feel and snappy sound. I’m Get a real Prince vibe from this telecaster build. I have even nicknamed it “Purple Rain”.
An Update
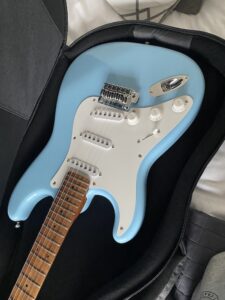
So since this article, I have had a full LT Custom GUitar built for me in an S-Tyle guitar! I was so impressed with how Lewis handled the Tele build that I thought I would get a fully custom guitar built by him! Don’t be fooled, this isn’t your ordinary Strat build, this is something special! Why didn’t I go to Fender? Well, check out the article as we explain everything over there!
Telecaster Build – Conclusion
I highly recommend that if you are looking for a high-end guitar for a low-end price, build your own. This way you can build the perfect guitar for you! Plus you get the fun of building it, painting and even changing the look dramatically (if you wanted).
I must give a huge shoutout and thanks to Lewis from LT Custom Guitar (Website below). Without him none of this telecaster build would be possible, he turns this guitar into a weapon. If you are after any guitar work or even a full custom guitar (I have a review coming soon) then please give him a shout, he builds some incredible stuff, really helpful and great value. Will I get a custom guitar from him? Well, more on that soon!
Check out our other Articles here
4 thoughts on “The Ultimate Telecaster Build – Could it be better than Fender?”
Comments are closed.