7 Tips for building a pedalboard – Things you need to think about

Introduction
Planning to build a pedalboard? Good! It is amazing fun and lets you fiddle and get the sounds you like from the pedals you enjoy! However, building a pedalboard can be an overwhelming task! How do you start? What do you have to do? Well, we thought it would be worth putting together an article going over a few tips I always remember when building a pedalboard.
In this article, we will go over 7 tips that you should think about when building your first pedalboard. Some tips you might already know and some tips might be mind-blowing! With that in mind, why don’t we jump into the first tip of the article? It’s all about cables!
Which kind of Cables to go for
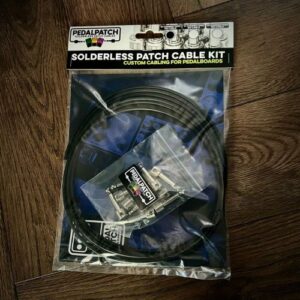
Going the Custom cables will provide a tidier and more organised board but can ramp up the price of the build. So the odd gigging player might not want to fork out the expense of fully custom cables from a custom cable manufacturer. Another option would be to go the solder-less route and make your own! We recently reviewed the Pedal Patch Solderless Cables and liked them (Check out the review here). These are a more affordable way of doing custom cables.
Or if you are really on a budget then your basic store-bought patch cables will do just fine. The difference between custom, solderless or store-bought isn’t really in quality, it is more in getting a cable that is the right length and the right jack angle.
Chose the right board. Do you need room to expand?
The next thing you want to think about is the size of your board. Sounds like a simple task but does require some thought. The main thought is, will you need room to expand? It is ok getting a board that will fit your set-up, and if you don’t plan to ever add pedals, all is good! However, if you plan to add pedals or you might change them in the future then you are going to need a bigger board. Spend a bit of time measuring the size of the board and find out how much you need and might need in the future.
Also worth looking at different layouts of the board, Do you want it all on one level but take up more floor space or do you want it to take up less floor space but be on multiple levels? There are pedalboards out there will shelves and levels so you can stack pedals, meaning you can get more pedals on without taking up a bigger footprint. Plus, it isn’t all about the pedals, What power supply will you be running? You need to make room for that.
Will you be swapping out pedals?
As guitarists, we lie to chop and change. Some more frequently than others. So, when building a pedalboard keep in mind how often you are going to be changing the pedals and configuration around. Are you the kind of person to change a pedal every week or every month? Maybe you don’t see yourself changing pedals at all. Why is this important? Well, if you plan to chop and change frequently then you will need to make sure you can remove pedals, change cables and maybe even the layout easily!
It might sound easy! Just take the pedal off and plug the new one in. Sometimes it is this easy, however, cable routing might be different. You might go from a top-loaded pedal to a side-loaded, meaning you will need extra cable length! Or you have gone from a 9v pedal to a 12v pedal! All these things might crop up if you chop and change regularly.
Carrying it and transporting it?
This might seem like a small point but something else might wanna consider is how you are going to transport your pedal board. If you are a gigging musician or a touring musician likelihood is you will need to transport your pedal board between gigs. So it is Worth considering if you’re going to need a travel case if your board comes with a case or if you’re just gonna risk it as it is. There are positives and negatives to each one of these not having a case means you’re bored to get damaged and broken between gigs, but also having a case could also increase the price and also make the board heavier overall. Something worth thinking bout when planning.
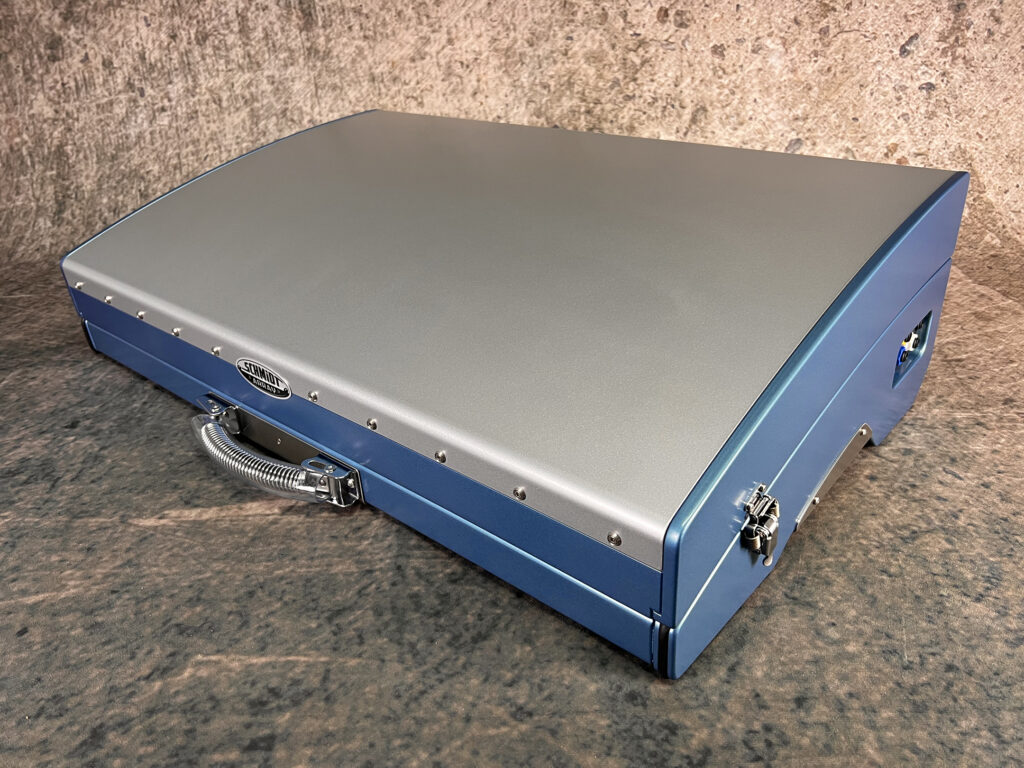
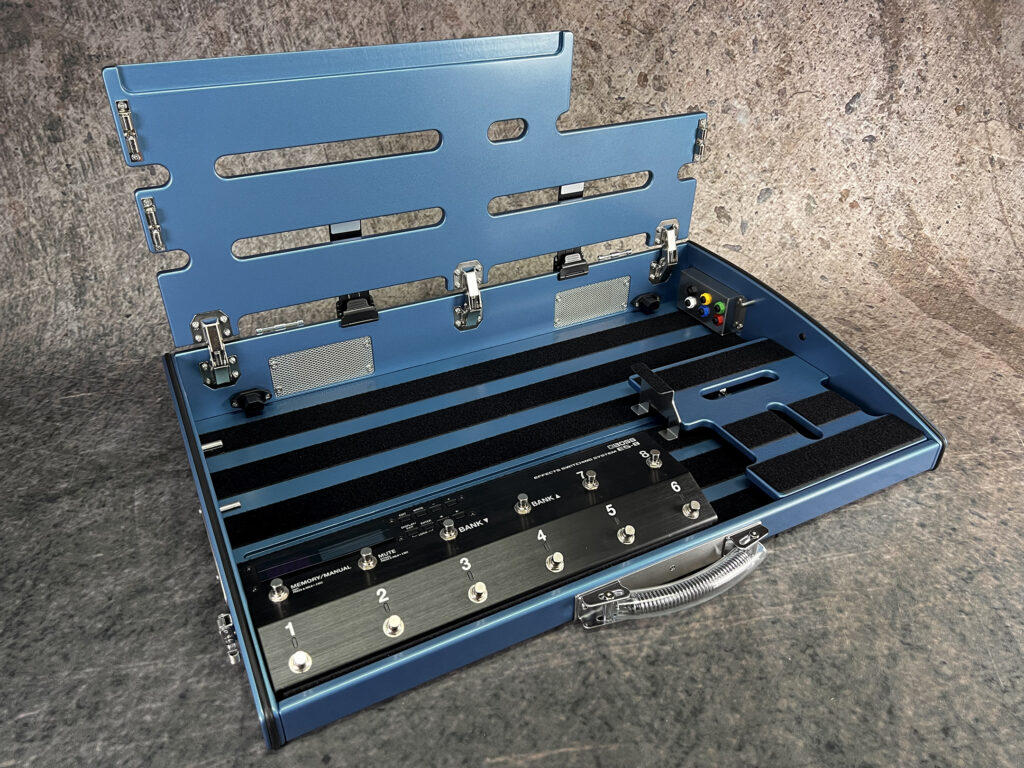
If you are after a case there are a few options you can go for. The first one would be an actual case. You build your board and then look for a pedalboard case to fit it. Can either be a soft “gigbag” kind of case. Or it could be a hard case, Like a flight case. The choice is depending on budget and usage. Your other option is to get a pedalboard with the case built-in. So something like the Schmidt Array board. These are pedal boards, that have a hard shell cover that can be removed! They are on the pricey side of things but are very customisable and hard-wearing!
Plan out as much as you can!
We have mentioned it a few times throughout this article, but plan out as much of the build as you can! Try to cover everything! Layout, Power, Cabling, Pedal choices, Pedal position even think about stage location and where you want the switches in relation! The more you think about and plan the easier it will be to build!
If you know all the little details then the bigger details will fall in place! Of course, we are all human, so we make mistakes and forget things. However, if you plan out as much as you can and then find you have forgotten something it should be fairly easy to correct it. I have even gone as far as doing a scale drawing! A big sheet of paper measuring all the pedals and marking them out! This way you know how big the board will be, cable routing and everything thing else before you even touch your actual board!
Think about what you are going to use it for?
It is also important to think about what you will be using your pedal board for. Will it be a touring rig? The odd gig, or will it be purely studio work? Why is this important? Because this will determine a few factors, how strong and secure everything has to be, How easy it is to fix issues. You will have more time to fix issues in your home studio than you will live on stage. Also cable routing and signal path. If you are always going to leave it plugged in then you don’t need to worry about getting to input and outputs, however, if you need to break it down after a gig, then you want all inputs and outputs to be easy to access.
Building a Pedalboard? Have fun and experiment!
Remember to have fun and experiment! For some people this is just a hobby, so make to keep it fun! Building a pedalboard is great fun! Getting to design something for you and to your requirements is amazing! Don’t stress about the details too much!
If you are planning to gig or tour with it then you will have to make sure it is road ready and easy to work with, but for the odd gig and bedroom practice, keep it fun, play around and see what works!
Conclusion
For anyone looking to build a pedalboard, I hope this has given you some tips and ideas to think about! Remember if you get stuck at any point or need some advice feel free to get in touch with us either on our Instagram or via Email. We are here to help! If you have built a board, upload a pic onto the gram and tag us or send it to us, we would love to see the boards everyone is building!
Hope you enjoyed this article it is something a little different and thought it would be useful to a few people! I would have killed for an article like this when I was first building a pedalboard! Be sure to check out our other articles and reviews! Give the Pedal Patch review a look if you are keen to make your patch cables!
Check out our other Articles here