Headrush Gigboard Walkthrough - How I have mine Set up!
Introduction
I recently put out our full review of the Headrush Gigboard. I have had a few emails asking if I could go through how I set up our Headrush Patch and how I go about building a patch. So I thought I would put together a little Headrush Gigboard walkthrough and explain the Main patch that I use for my band and Rehearsals and Gigs.
Quick side note, I am often changing things around in this preset, so I will try to update this article as things change, or maybe I will create another article in a few months with what has changed. So whenever you are reading it may have changed, or I may have found the best patch ever and kept it this way.
My Aim with this Patch
The first part of this Headrush Gigboard Walkthrough is what is my aim with this preset? I wanted to cover all the sounds I might need for any song we chose to do. The Headrush unit can do a lot of things and can be set up to do whatever you want, however, for me I wanted it to be simple and easy to use. So have kept the preset and switches fairly simple.
I knew I wanted a Clean and crunch channel, I will need a boost for solo’s and also a few effects for colour. So I got to work setting up a nice clean tone first. I picked an amp and dialled in the settings. So what Amp did I pick?
The Amp and Cab
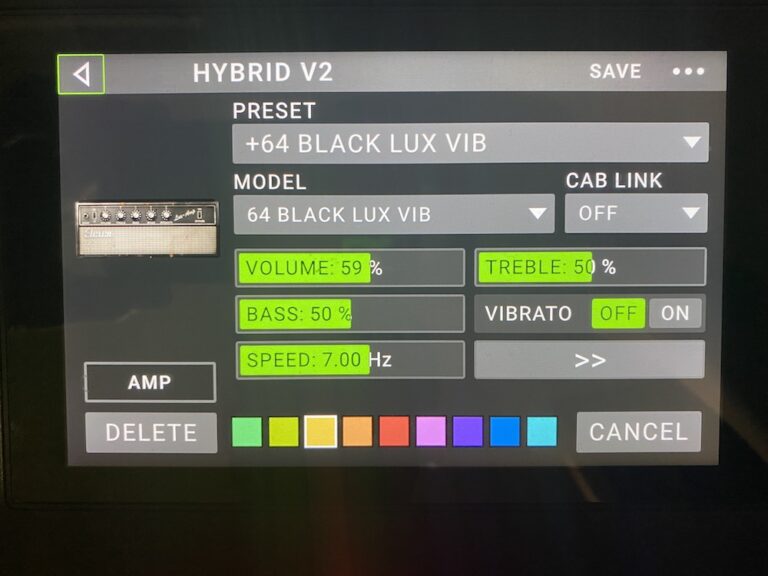
So let us begin with the actually Headrush Gigboard Walkthrough, What amp? I am running the Black Lux Vib (Based on: Fender Deluxe Reverb). I was after a nice clean. A clean, clean sound! Plus I think this Amp model sounds great with the effects I have picked out. Headrush will assign you a cab by default, however, I haven’t gone with this Cab sim I have picked something different.
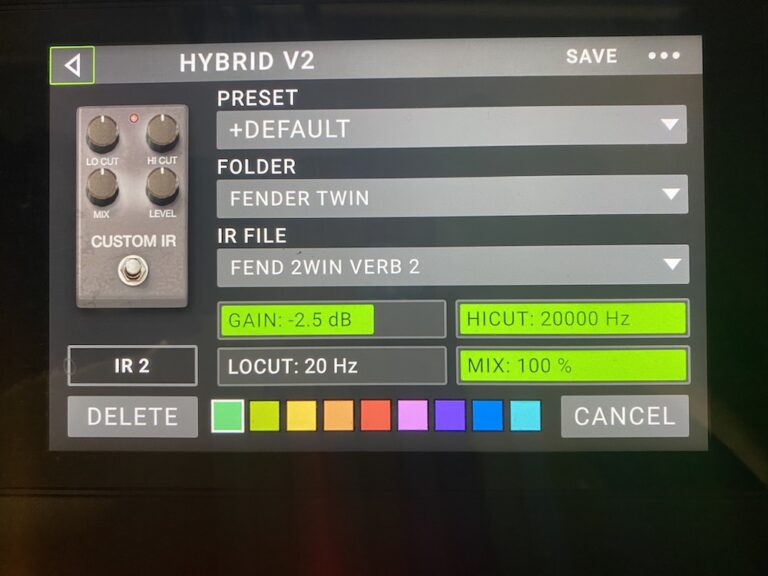
For the cab I haven’t used the Headrush built-in cab’s, I am using my own IR. Which is something I highly recommend that you do as well! It makes the unit sound so much better! For the IR I am using a Fender Twin Reverb I purchased from Lancaster Audio. I picked this one because out of the IR’s they had this is the one I thought would pair the best with the deluxe.
All the Effects
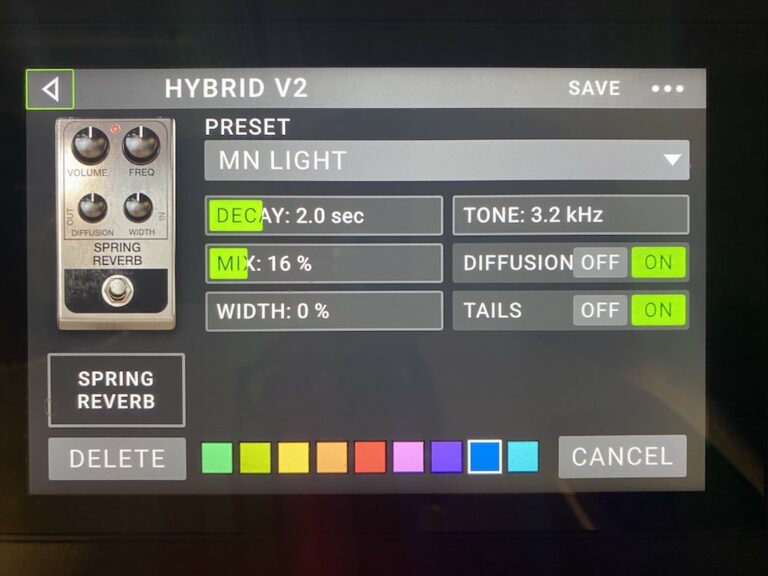
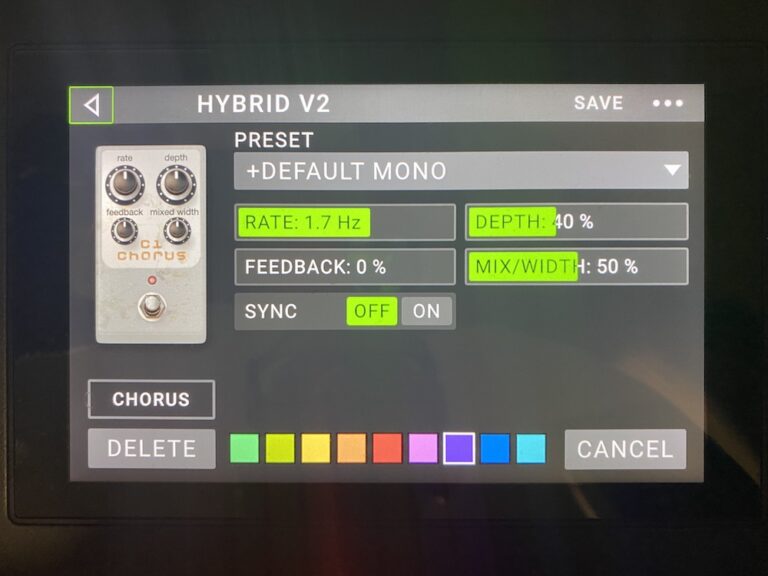
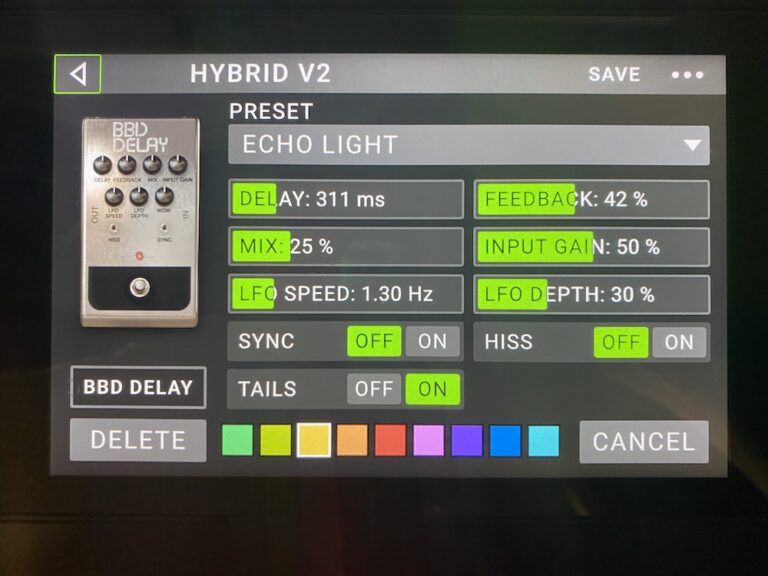
I have a few effects on this patch. Let us start with the always my wet effects. There is a small spring reverb and this is always on effect and doesn’t change at all (Name: Spring Reverb Based on: Fender Spring Reverb). I also have a Delay (Name: BBD Delay Based on: EHX Deluxe Memory Man), A Chorus (Name: Chorus Based On: Boss CE-1).
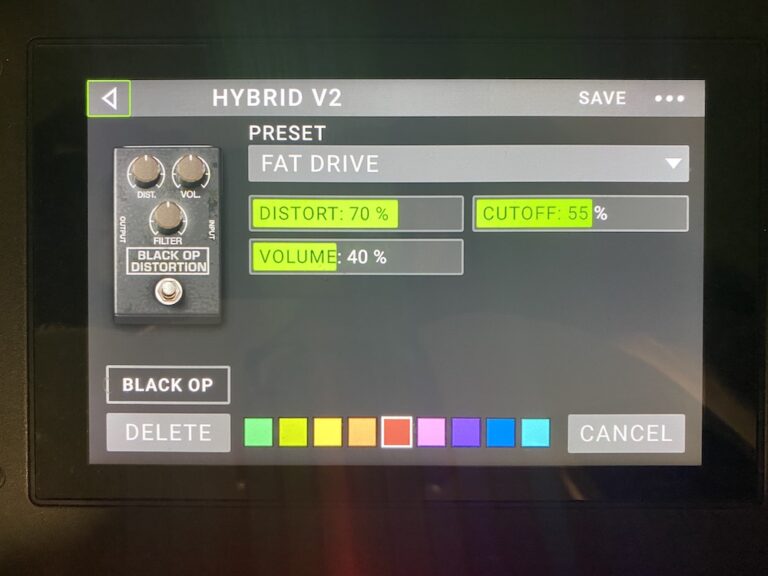
For my gain, I have a Gain/Distortion pedal (Name: Black OP Based on: ProCo Rat) for my main gain stage, and then if I need a volume boost for a solo or lead part I have a Boost pedal (Name: White Boost Based On: Xotic RC Booster) to give me a volume increase and a slight bit more gain. The last effect I have is a Wah Wah which I control with the expression pedal, however, we will go over this more in detail shortly.
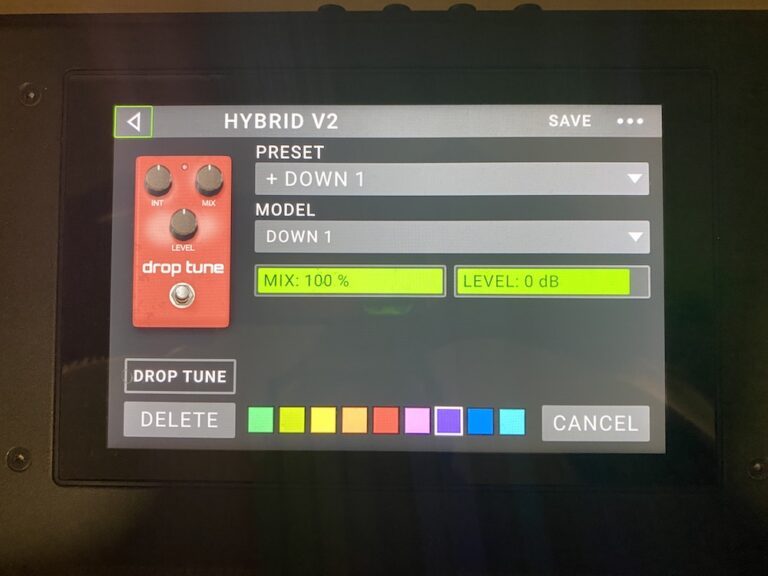
I have also got a Drop Tune pedal (Name: Drop Tune Based On: Digitech Drop), to take my guitar down a semitone. This saves me from having to re-tune for a few songs and allows me to change the tuning of my guitar on the fly. I don’t have this running on any of the footswitches as I only have a few songs I need this for a few songs.

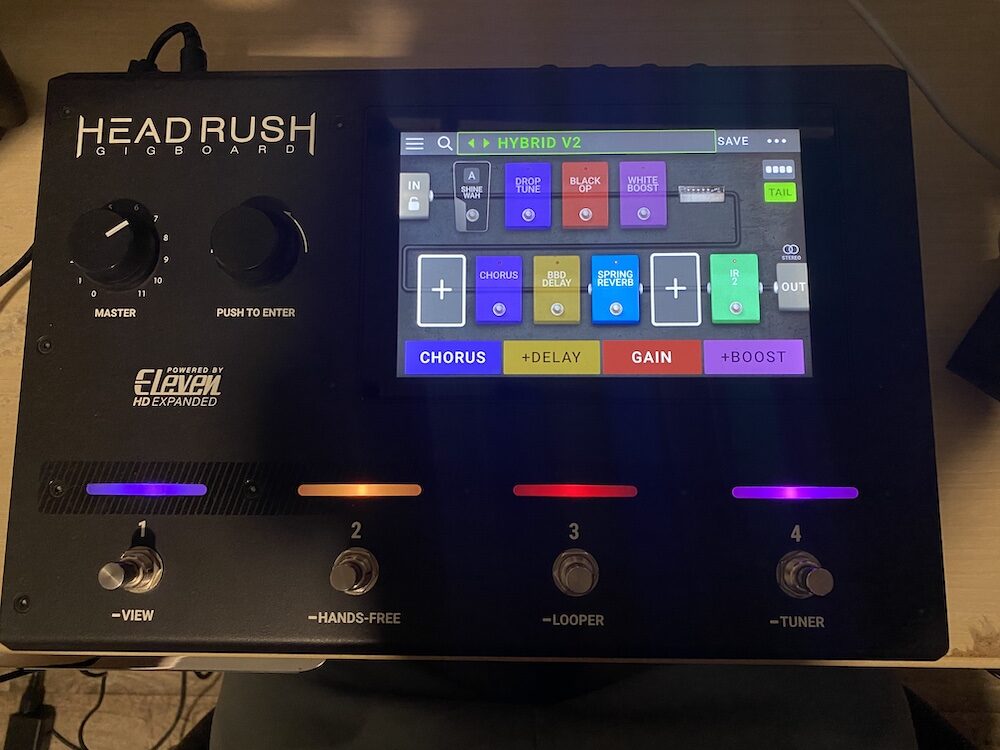
The Signal Path
What is my signal path? So my guitar plugs into the input and then goes through the Input” sections of the Headrush, all this does is put a noise gate on. I have disabled the noise gate completely. I am not a fan of noise gates and the feel of them. Then we go into the Wah Wah, into the Drop Tune (These will get swapped around soon), Then into the Black OP, then the boost and then we hit the front of the amp.
In the Amp’s effect loop (Theoretically) we have a chorus first and then into the Delay and then reverb last. Then we hit the IR and then into the Headrush output. The output section allows you to adjust the width and output volume of the unit.
From the Headrush unit, I output in mono to my Boss Katana using the power amp in. I have explained why I use the Katana before but I use it so that if anything goes wrong I can plug my guitar direct into the Katana. I haven’t used the Gigboard direct into the PA yet, but may mess around with that soon!
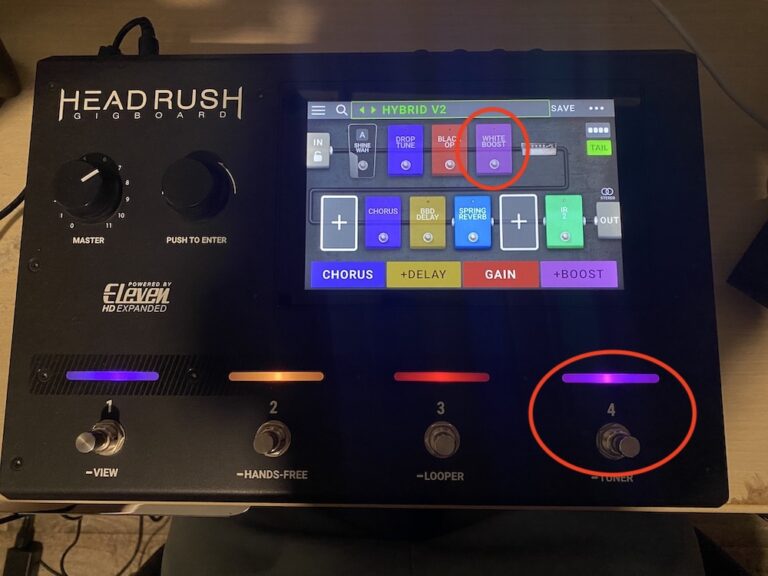
Footswitches and Scenes
So the main part of this Headrush Gigboard Walkthrough, How do I have all this setup? What are my Switches and scenes doing? If you don’t know about Headrush then you can set up a footswitch to control several effects or settings at once. These are called scenes. So you can switch off or on several effects at once. I haven’t done this!
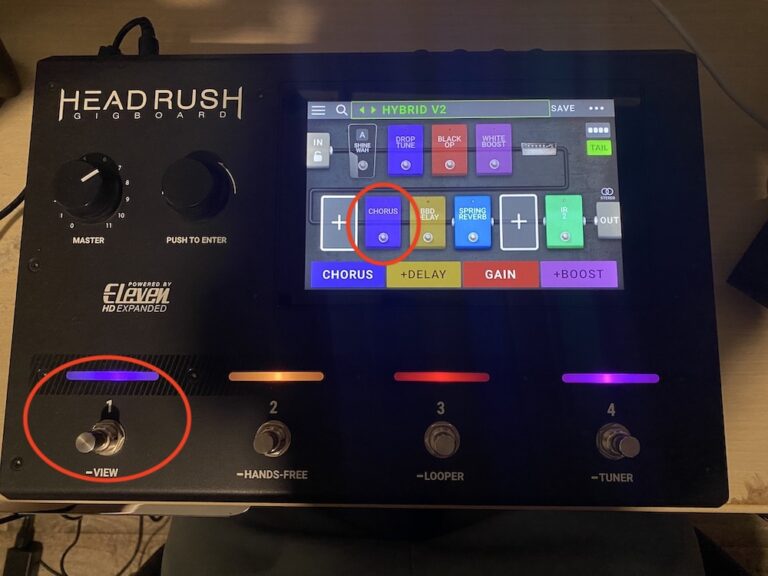
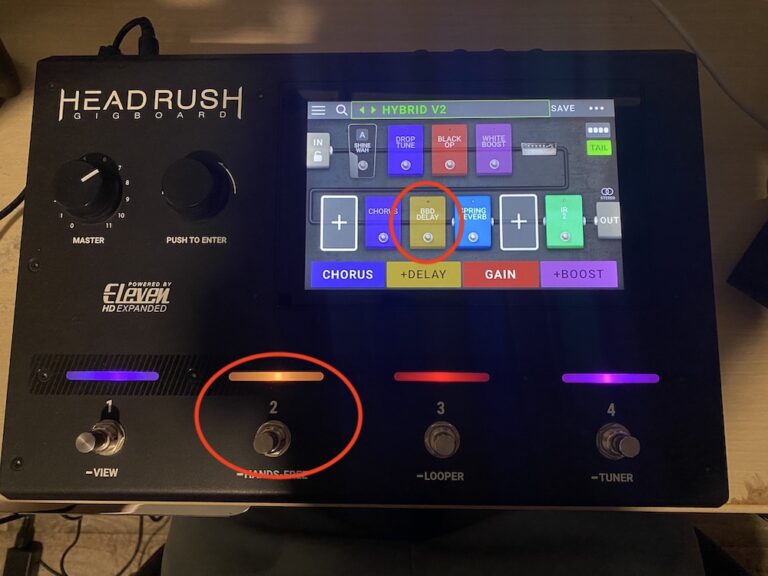
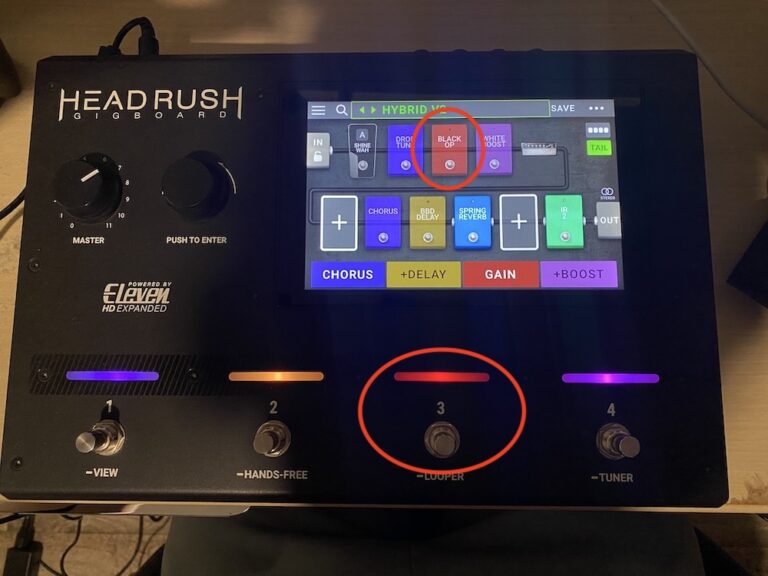
I have used it as if each switch was its pedal! So my first pedal is set up to switch the Chorus off and on, The next one along is used to Switch the Delay off and on. The third one is used to switch the Distortion off and on and the last one is for the boost pedal.
The chorus switch is only a recent addition. I did have that set up as a “Clean” switch, which was just switching all effects off. However, I found myself rarely using it, so replaced it for the chorus as I need chorus for a few songs.
If I had the full-size pedalboard, I would set up more scenes and have things like “Solo” “Crunch” and “Clean”. The reason I don’t is that I only have 4 switches and need a varsity of songs. So I just use them as individual pedals and I can get everything I need.
Expression Pedal
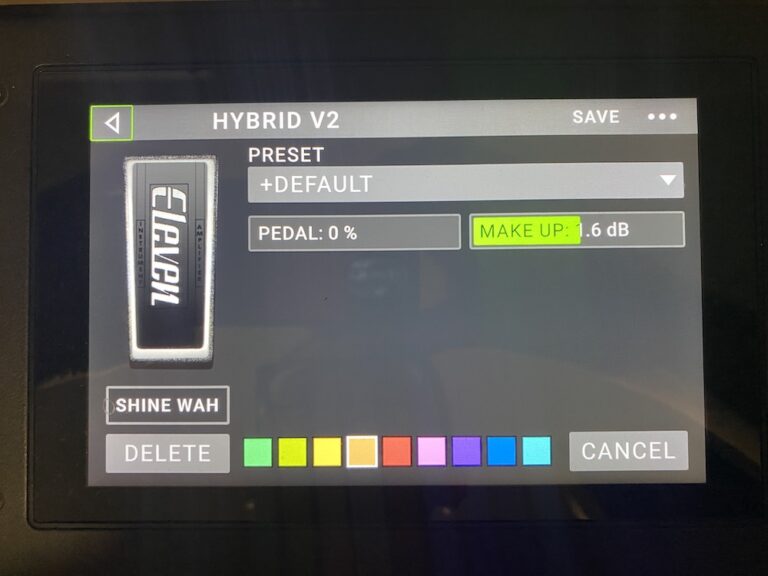
I thought I would touch on the Expression pedal. Currently using the Headrush Expression pedal for use with the Wah (Name: Shine Wah Based On: Vox V486). I will mess around will controlling a few parameters but for now, I am happy with it just controlling the Wah Wah.
Sound Example
Conclusion
So that is my Headrush Gigboard Headrush, as I said in the review, I think for the price point it is a great unit! It is underrated and if you are looking at getting an Amp sim or multi-effect then you should consider the Headrush models. As I have said throughout this article, my preset will change and I will change things around, but for now, this is what I am using and how I am using it!
If you want to check out our full review you can here and if you want to purchase the unit or any of the other units for yourself you can use our Affiliate Thomann link below as well as the review link.
Buy Headrush Pedal Board Link Link (Affiliate Link)
Check out our other Articles here